BridalLive's Point of Sale module allows you to print both Invoices and Payment Receipts. Printing Payment Receipts is optional, but many of our stores like the ability to print a small receipt when a customer makes a small purchase rather than printing the entire invoice on an 8.5 X 11 sheet of paper. Additionally, using a Receipt Printer allows you to pop open a cash drawer when a cash payment is received.
Before you can begin printing Payment Receipt and popping open cash drawers, you'll need to first set them up. In this article, we will show you how!
Installing Receipt Printer
Our Recommended Hardware page displays a list of supported Receipt Printers that you can choose from. Once you've purchased your desired printer, follow the manufacturers' instructions to install the printer.
If you would like to have the Receipt Printer trigger a cash drawer pop, further setup is necessary. Follow the steps below based on your computer's operating system.
Setting Up TSP100 to pop open Cash Drawer on Windows
If your TSP100 receipt printer is not connecting to your computer, is offline, or not printing from other applications, you will need to reach out to Star Micronics to get the printer connected to the computer.
- Plug the RJ12 connector cable (the one that looks similar to a phone line) from the cash drawer into the receipt printer.
- Navigate to "Devices and Printers" on your computer
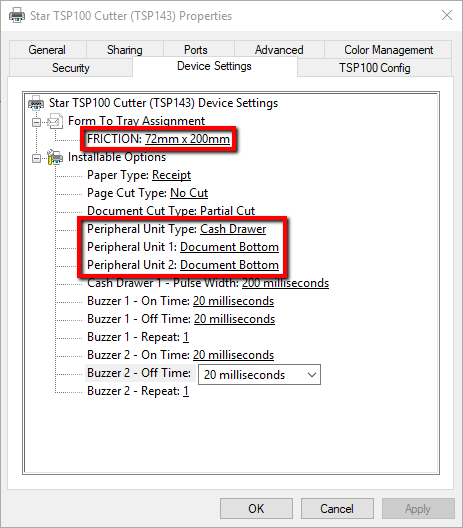
- Right click on your receipt printer, select Printer Properties Device Settings.
- Make sure your settings are the same as the red boxes below:
- FRICTION: 72mm x 200mm
- Peripheral Unit Type: Cash Drawer
- Peripheral Unit 1: Document Bottom
- Peripheral Unit 2: Document Bottom
- Once this is complete, follow the instructions below to test your cash drawer opening.

Setting Up TSP100 to pop cash drawer on Mac OS
Configuring the receipt printer to pop open the cash drawer on a Mac is a bit more complex. Here are the steps that we've found work.
- Plug the RJ12 connector cable (the one that looks similar to a phone line) from the cash drawer into the receipt printer.
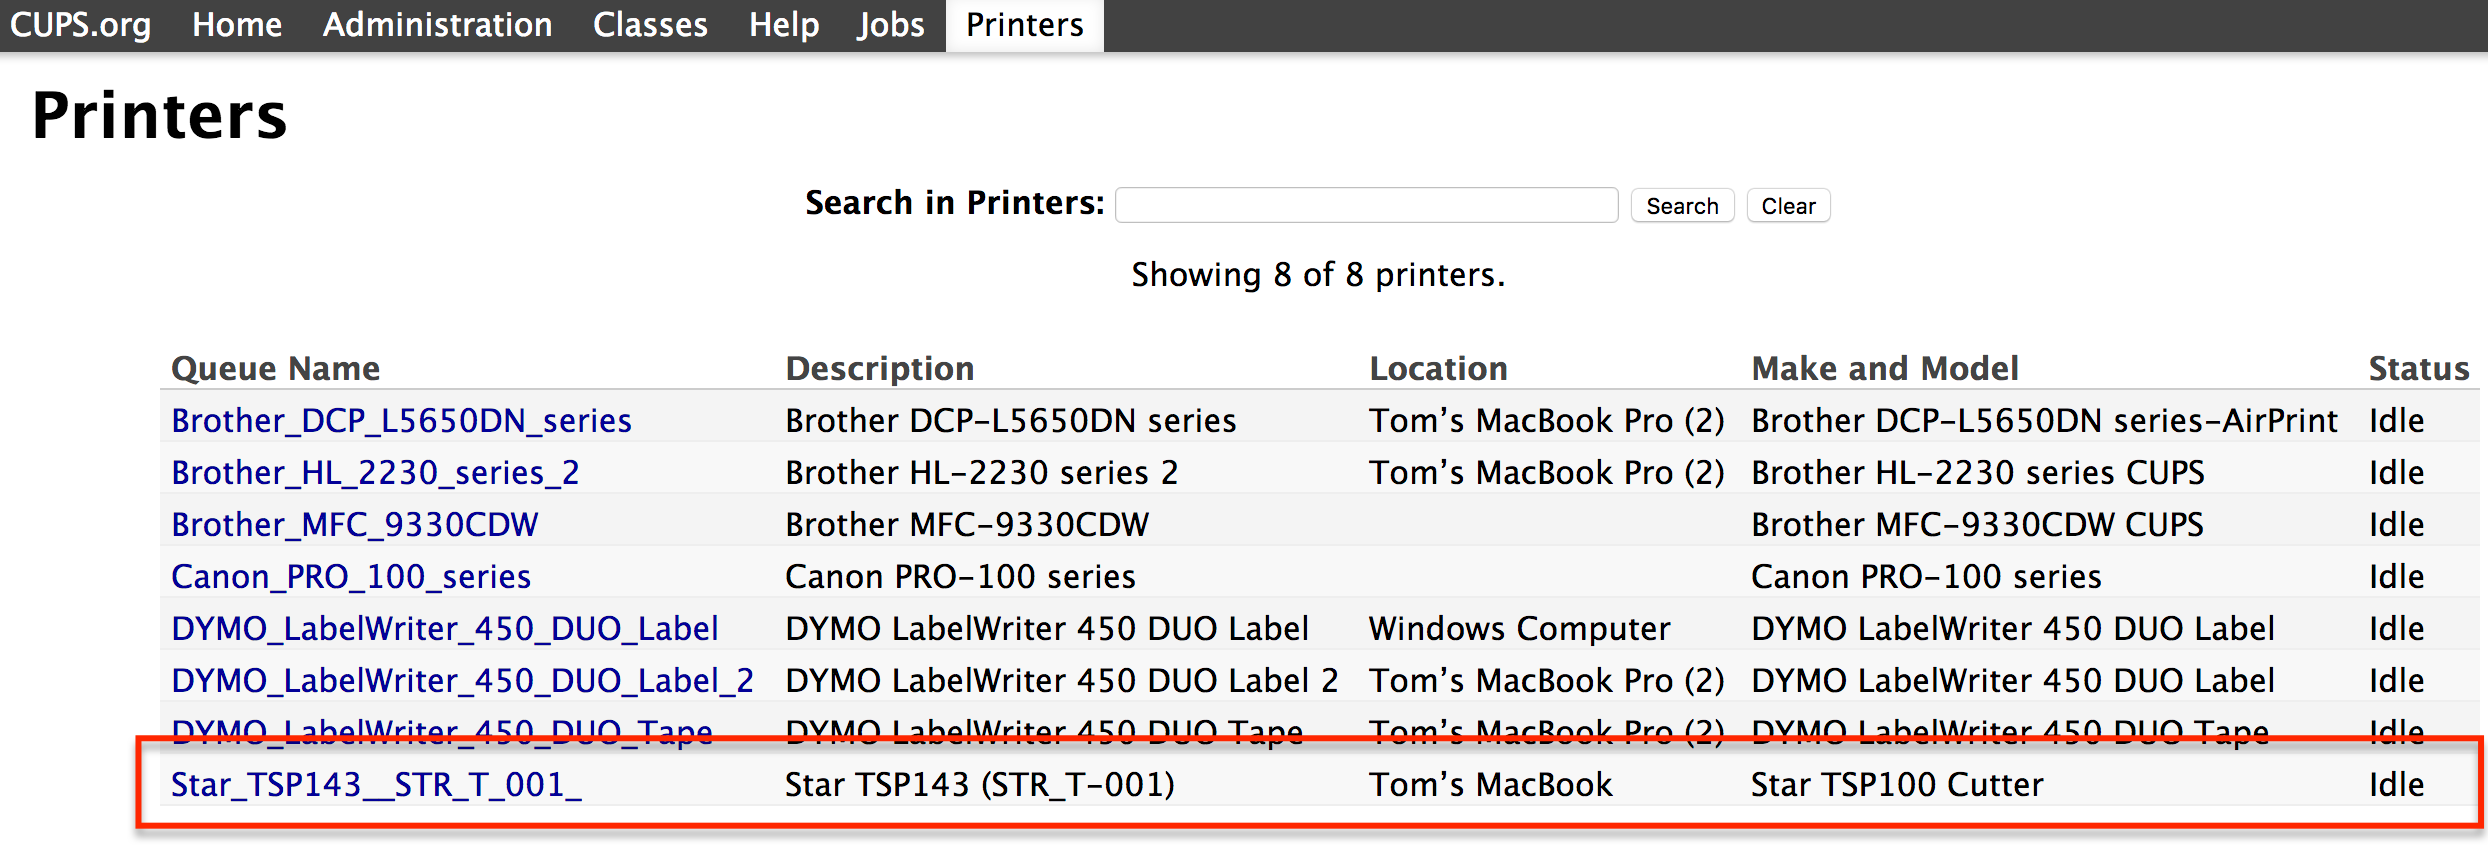
- Head to the following URL: http://localhost:631/printers/. This will take you to CUPS. CUPS is a network printing service used by Mac computers. It allows you to set up your printers on a network, and customize options such as cash drawer setup.
- If you see a message that says "Web Interface is Disabled", you'll need to enable it before proceeding. This article discusses how to do that.
- Once the web interface is enabled, select your receipt printer from the list.

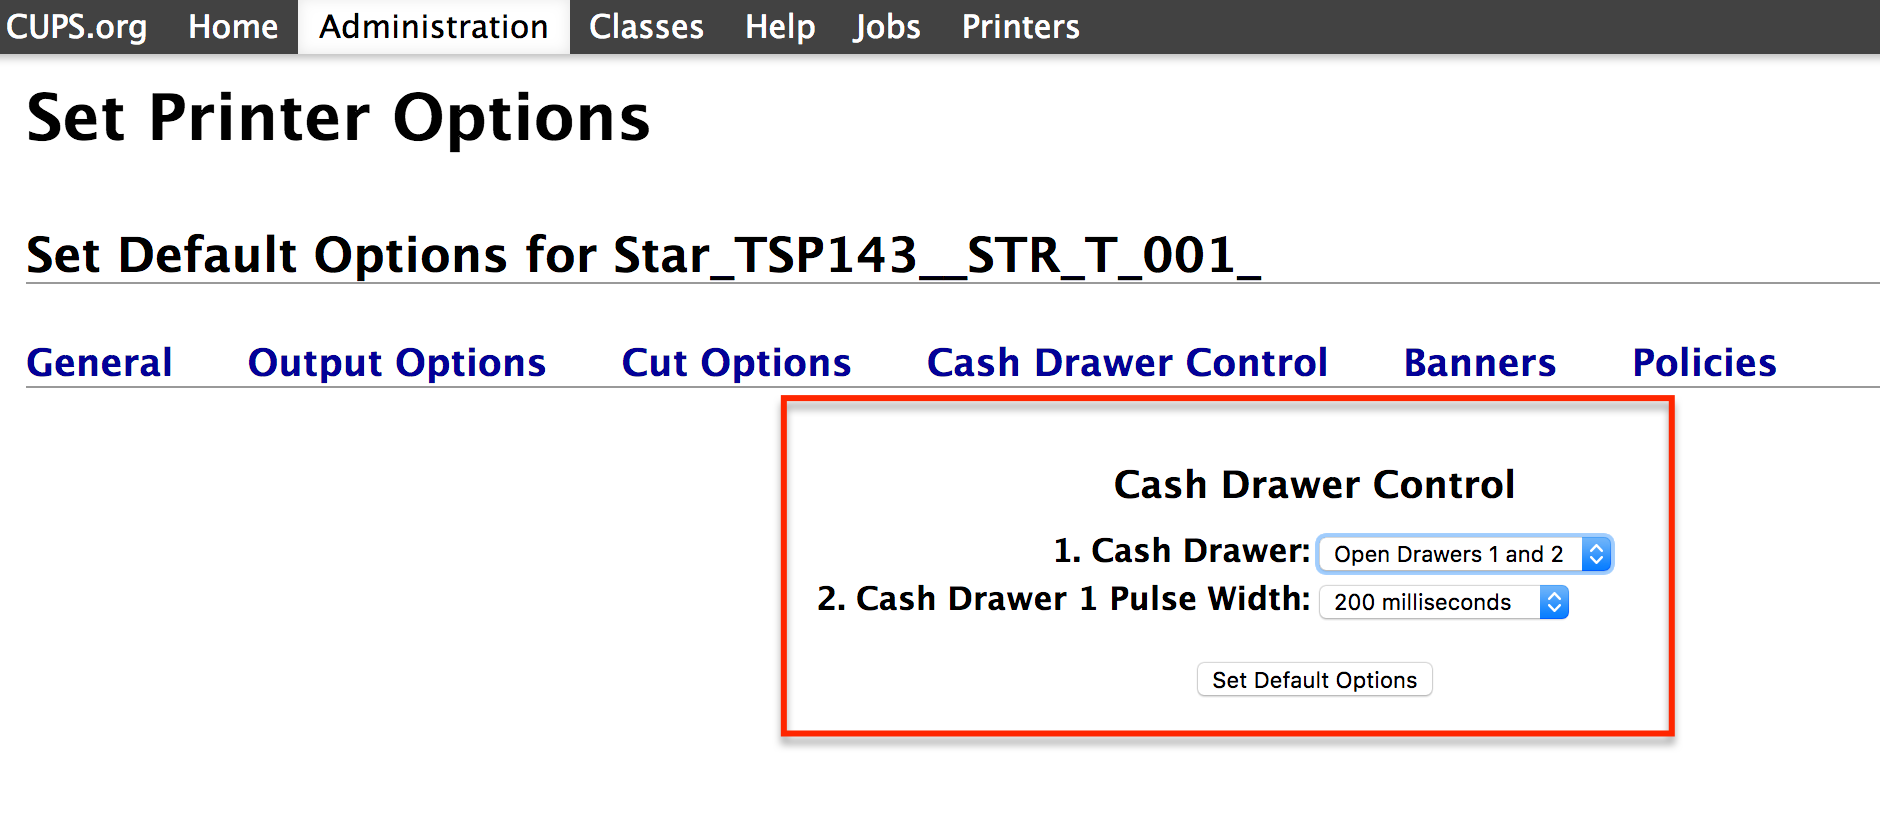
- From the Drop Down select "Set Default Options"

- Next, Select "Cash Drawer Control" and choose "Open Drawer 1 and 2"

- You should be all set to go. Follow the steps below to test the cash drawer.
Testing the Receipt Printer and Cash Drawer
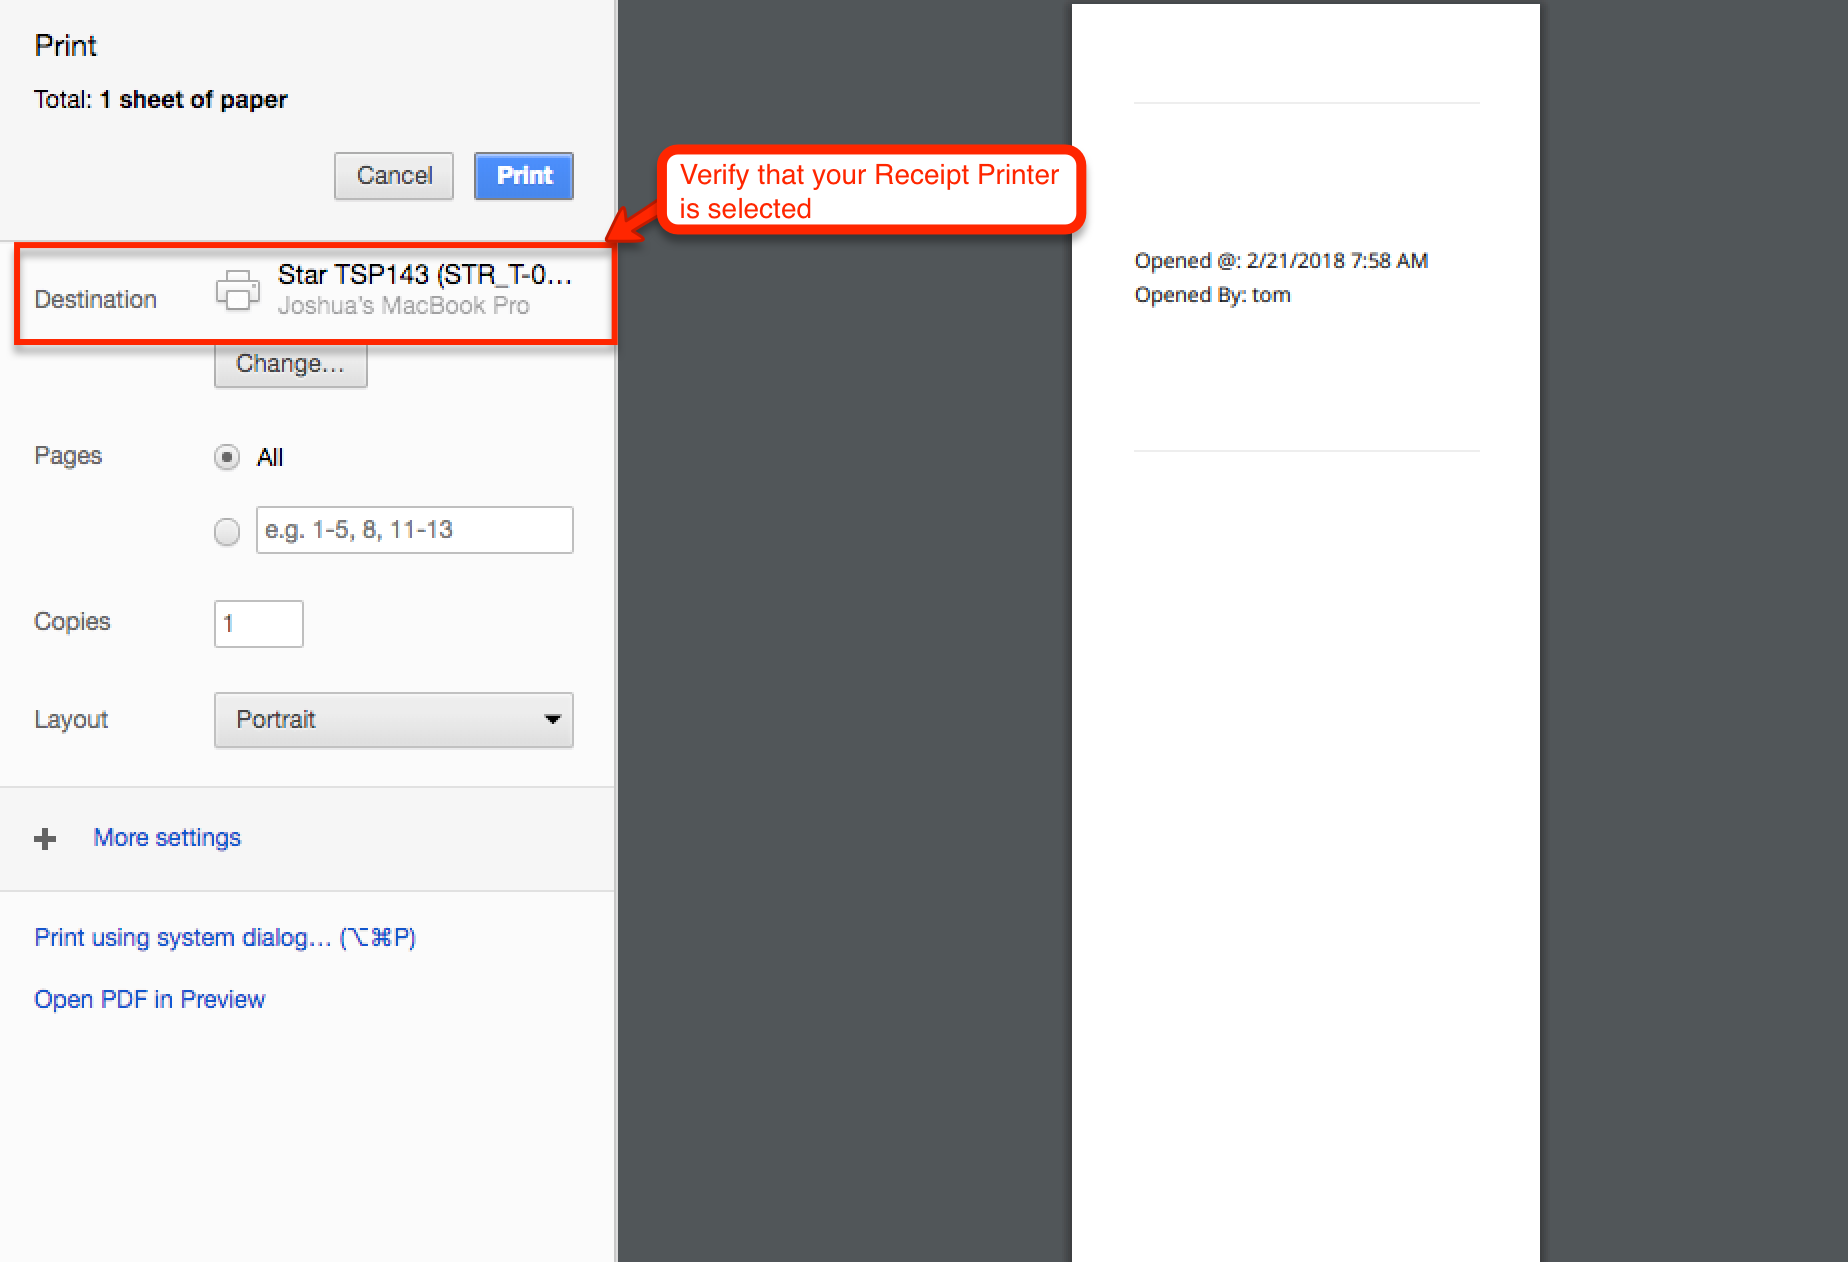
Once you've completed the setup, you'll want to test things out. You can test the operation of your Receipt Printer and your Cash Drawer at once with the "Open Cash Drawer" feature inside of BridalLive.
This feature is located under the Register Icon at the top right-hand corner of BridalLive (shown below). If you do not see this function, you'll need to verify that your user account has the "Open Cash Drawer" permission. This permission is located under Settings Users and Security Users Roles Point of Sale security group.

If the Receipt Printer prints the Open Cash Drawer Ticket and the Cash Drawer pops open, you've successfully configured your hardware!