BridalLive has a waitlist function to allow your customers to add themselves to a waitlist from your online appointment form based on your settings.
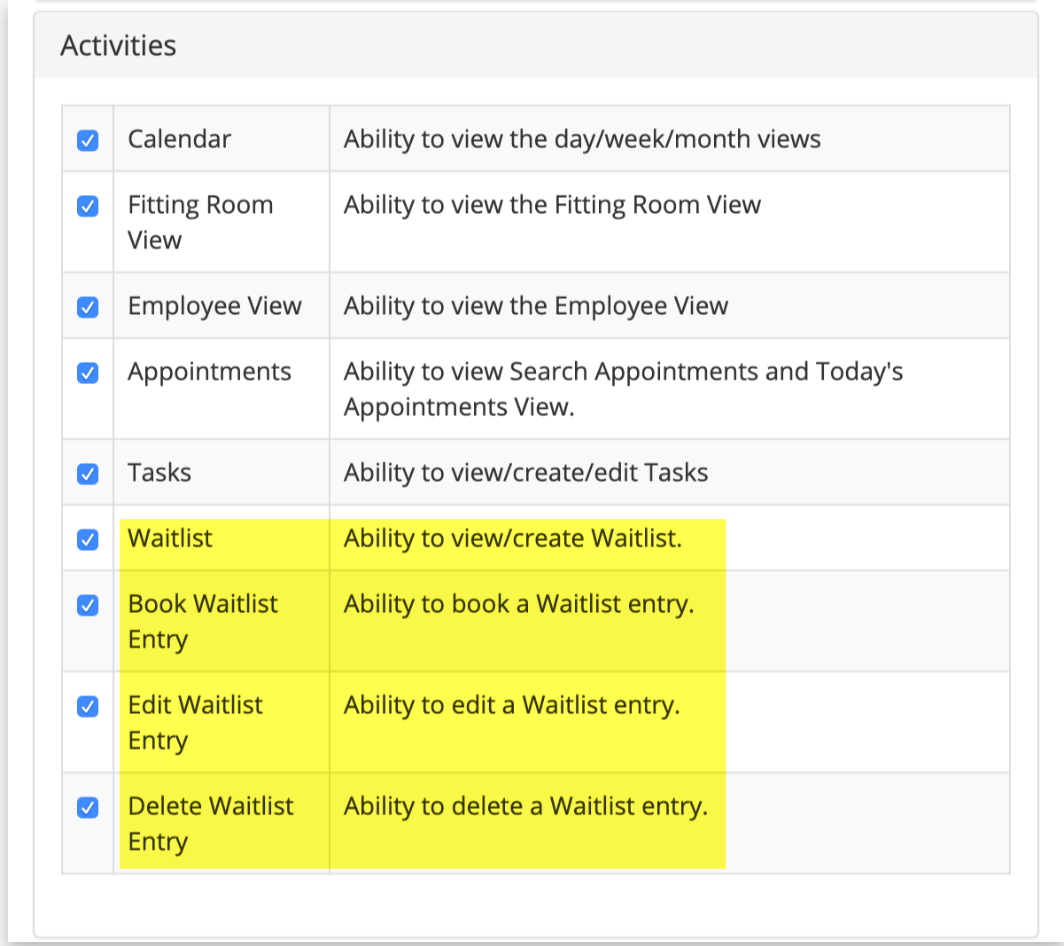
Waitlist User Roles:
Settings > Users & Security > User Roles > select Edit next to User Role > click Activities
Waitlist Setup:
Access the Waitlist setup by going to Settings > Activitites > Preferences
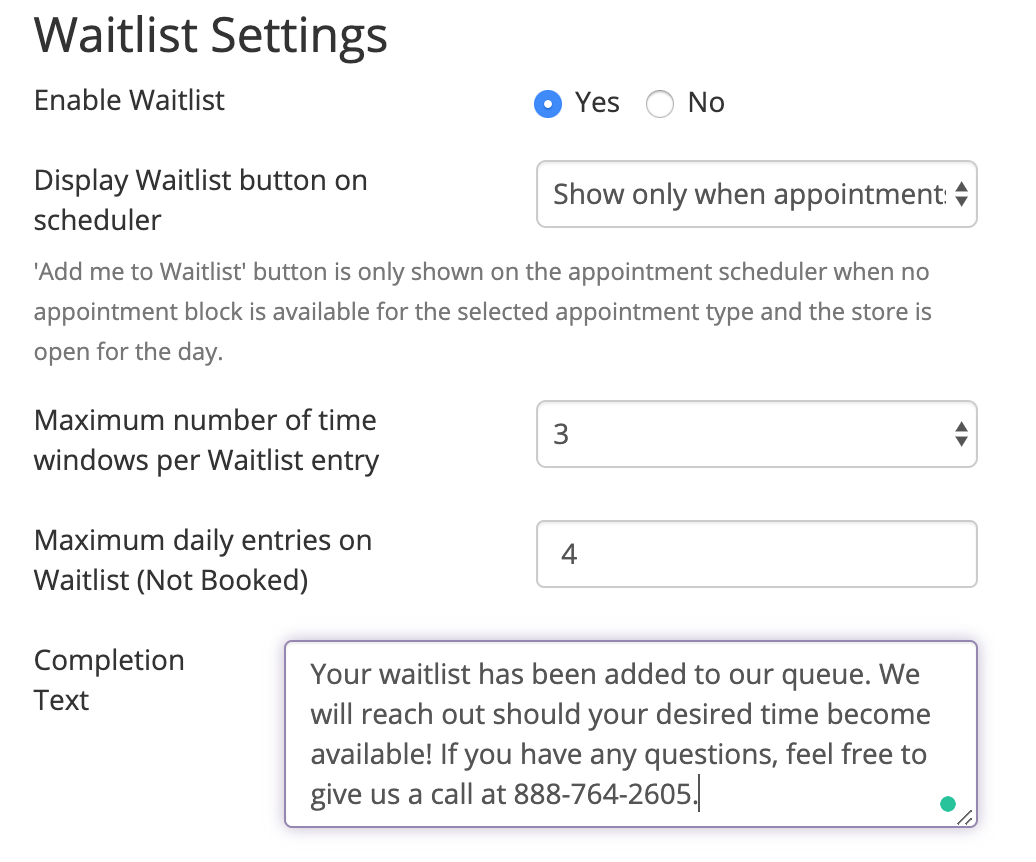
- Enable Waitlist - this setting will enable the waitlist feature on your Activities menu on the left menu of BridalLive and allow customers to view the waitlist based on your settings on the Appointment Scheduler
- Display Waitlist button on Scheduler -
- Always - The 'Add me to the Waitlist' button will show on all of your open days (based on Company Profile Hours) no matter if you have appointment blocks available on the day or not.
- Show only when appointments are not available - The 'Add me to the Waitlist' button will only show on open days when all available blocks have been booked.
- Never - The 'Add me to the Waitlist' button will never show on the Appointment Scheduler. You could use this setting if you want to only manually add Contacts to the Waitlist inside of BridalLive.
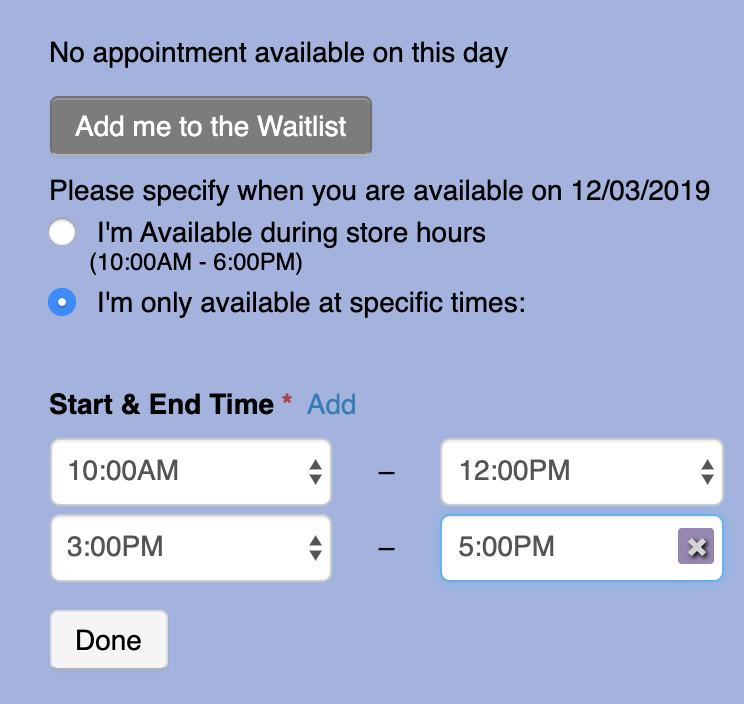
- Maximum number of time windows per Waitlist entry - When the customer selects to submit their waitlist entry with only specified times, this field will limit how many specified times they can give you.
- Maximum daily entries on Waitlist (Not Booked) - This field will calculate how many customers are allowed to submit waitlist entries for the same day. Only not booked waitlist entries will count towards the total.
- Completion Text - Enter a text here to show to your customers once the waitlist entry is submitted
Enable Waitlist for Appointment Types:
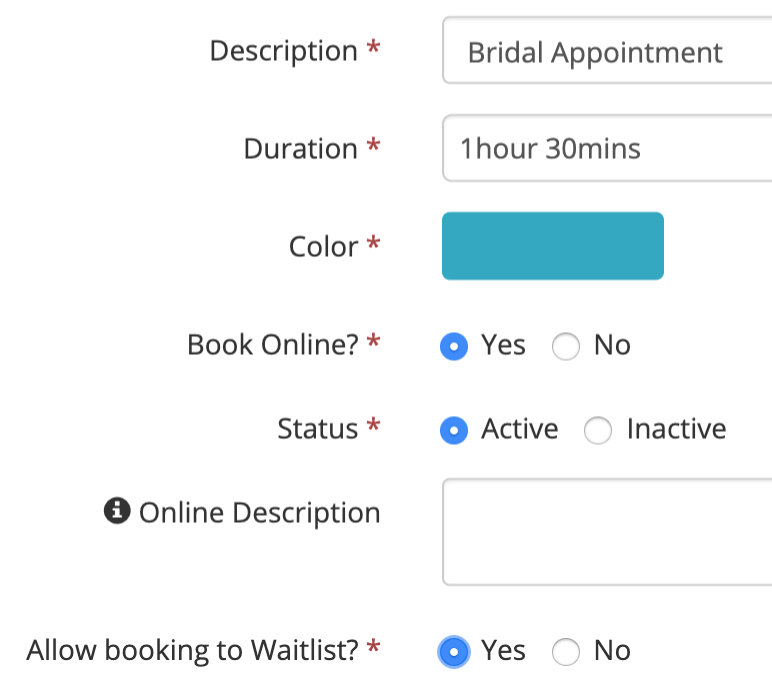
You can enable the waitlist for certain appointment types. Navigate to Settings > Activities > Appointment Types > select Edit next to the Appointment Type and set Allow booking to Waitlist? to Yes.
Add to Waitlist and View Waitlist entries:
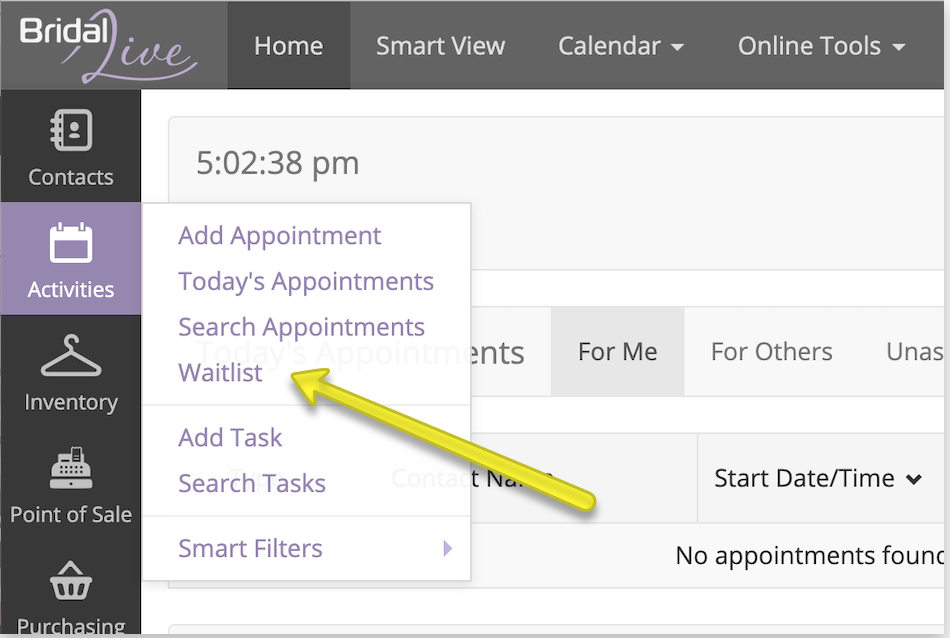
Access the Waitlist entries and the option to manually add to the Waitlist by going to Activities on your left menu and select Waitlist
The Waitlist entries will show Start Date/Time. It will either say All Day or have time slots. The All Day means the customer submitted their Waitlist entry saying they are available all day during the store's Company Hours for that day. If the Start Date/Time has time slots, the customer submitted specific times they will be available during that day.

View Waitlist on the Calendar:
Click the button with three dots at the top of your calendar.
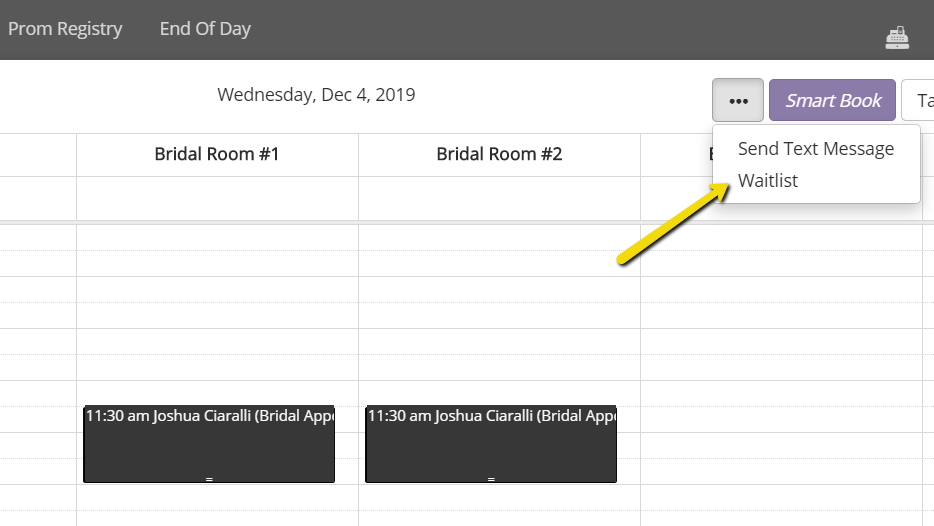
You can view the waitlist entries for a specified day.
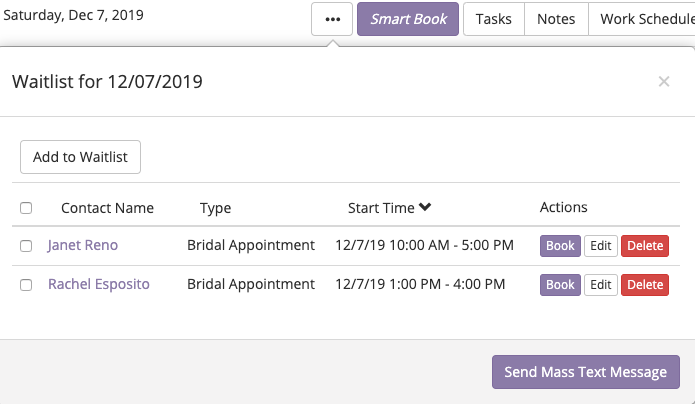
Book a Waitlist entry:
- Click Book under the Actions of the Waitlist entry you would like to book
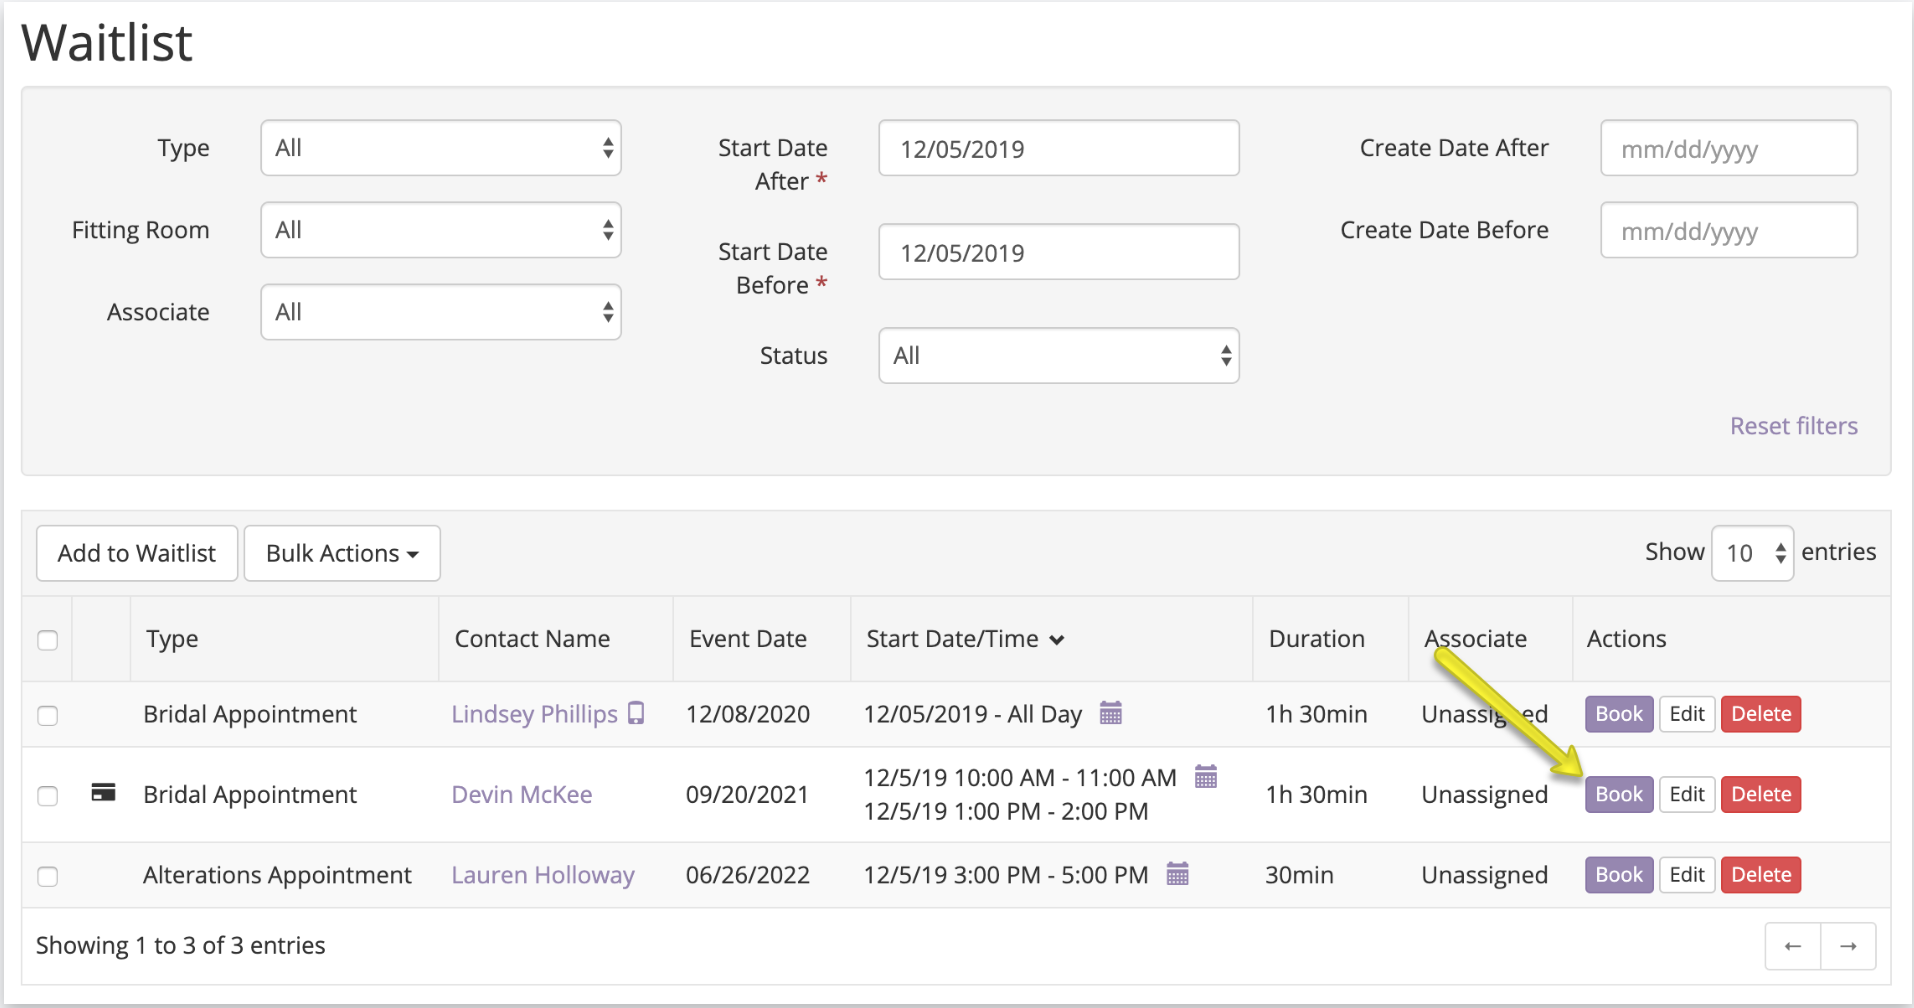
- Select your Start and End Times based on what options you have available on your calendar and when the customer states they are available.
- Save and close appointment to add to calendar