Overview
The Registers feature allows you to do the following:
- Track payments received at each register location
- Open the Register to begin taking payments
- Close the Register at the end of the day
- Balance the Till
- Print and View Register Closure Summaries
- Manually Open the Cash Drawer
- Track each time the Cash Drawer was opened
Before we begin exploring these features, let's start with some basics.
What is a Register?
A Register is the physical location where you take payments from customers. This typically consists of a computer, monitor, credit card terminal, cash drawer, and receipt printer. However, it can also simply be an iPad or a stand-alone computer. For example, you might have Registers named: Front Desk 1, Front Desk 2, Back Office, Consultant 1 iPad, etc. In BridalLive, you'll want to create a Register for each location where payments are taken.
Setting up your Registers
Before you can begin using this great feature. You'll first need to set up your registers. To do so, follow the instructions in the article titled Setting up your Registers. Once your registers are set up, BridalLive will assume that you want to utilize the registers feature and will require you to "Open the Register" before payments can be taken.
Register Permissions
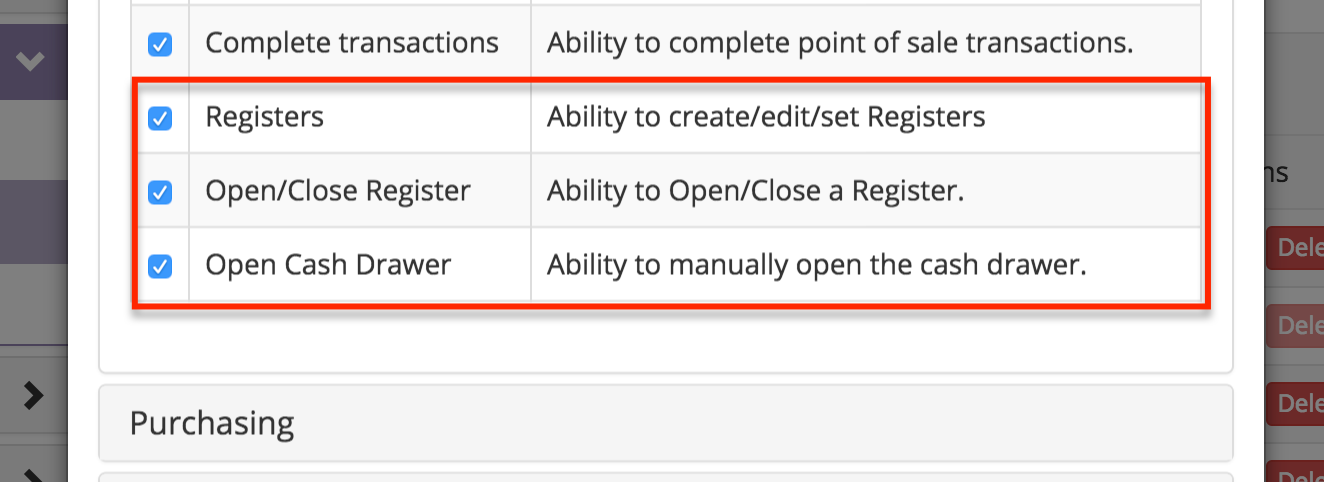
The Register functions are secured using the Register Permissions which are found under Settings Users and Security User Roles. Within the Point Of Sale security group, you will see the Register Permissions (shown below). By default, all Administrators have access to the Registers feature. If you would like your sales staff to utilize any of the Register features, then you will want to grant the appropriate permissions.

Opening the Register
Before you can begin taking payments with a Register, you must first "Open" it. If you try to take payment without first opening the Register, BridalLive won't allow it. You will be prompted to "Open" the register before accepting the payment. For this reason, it is best to open each Register in the store as part of your store opening routine.
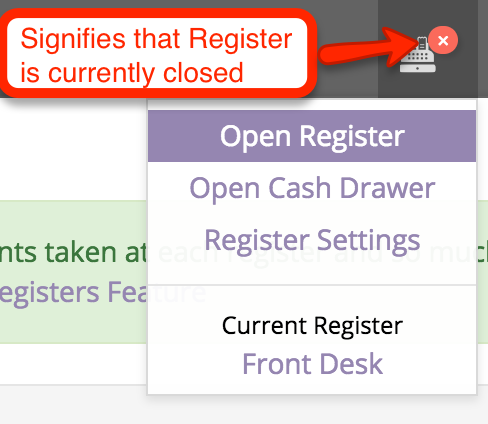
To open the Register, click the register icon at the top right-hand corner and choose "Open Register" as shown below. If you do not see the "Open Register" option, a register has not been "Set" for your device and you'll need to Setup the Register on your device. Once the register is open, you will see a green money icon displayed next to the register indicating that this register is open for business!

When Opening the Register, you will be asked to specify the amount of cash in the Cash Drawer and optionally provide any opening notes. To expedite the process of counting the cash drawer, click the Change Icon next to the Opening Amount to utilize the cash counting feature. Once the register is open, BridalLive will begin tracking all of the payments taken and refunds given for this Register.

Important Note: We recommend that the store manager verify that all Registers are open before the doors open for business. This is very simple and can be done by viewing 1 report: Register History Log. This report is available under Reports Audit Logs. In order to see this report, you must have the Audit Logs and Open/Close Register permissions.
To verify that all registers in the store are open, run the Register History Log for the day as shown below. If any of your Registers are not shown, that means that they have not been opened for the day OR they have not been properly closed from the day prior.

An alternative way to verify that all registers are open is to utilize the Settings Point of Sale Registers screen. Registers are highlighted in green when they are open.

Closing the Register
After the store has closed for the day, you will need to close each register in the store and print the Closure Summary. To close the Register, click the register icon at the top right-hand corner and choose "Close Register" as shown below.

You will then be presented with the Close Register screen. This screen displays the information from the Register opening, an "Expected" amount for each payment method and the Closure notes.

The "Expected" amount for each payment method is calculated in the following ways:
- Cash - Expected Amount = Opening Amount + Total Cash Received - Change Given
- Credit Card - Total Credit Card Payments received on this terminal. The amount received for the entire store is displayed as well. The store-wide amount should match your credit card's batch amount.
- Check - Total amount of checks received
- Other - The total of any payments that did not have a payment method category assigned. This amount is typically 0, but we show it on the Closure Summary so that you can catch any oddities.
As part of the Register Closure process, you will want to reconcile the cash in the Cash Drawer with the Expected Cash Amount, your credit card batch with the Expected Credit Card payments and the total amount of checks with the Expected Check Amount. Once you have done this, enter your Closure notes and click "Close Register and Print Summary".
Viewing the Closing Summary
If at any point in the future, you'd like to view the historical Opening/Closing of the Registers in your store, you can utilize the Register History Log. This report is available under Reports Audit Logs and can be run for a date range to view all the Opening/Closing for one or all registers. Once the results are displayed, you can view the Closure summary by clicking the "View" button next to the result.

Manually Opening the Cash Drawer
From time to time, you may find that you need to open the cash drawer without taking a cash payment. We call this "manually opening the cash drawer". Each time this is performed, BridalLive tracks it so that you can see who opened the drawer and when it was opened. Before this can be performed, you must have already Set up Receipt Printer and Cash Drawer.
To manually open the cash drawer, click the register icon at the top right-hand corner and choose "Open Cash Drawer" as shown below. In order to perform this function, you must have the Open Cash Drawer permission which is available under User Roles Point of Sale.

Since cash drawers are opened via the Receipt Printer, BridalLive must connect to your Receipt Printer to pop the drawer open. To initiate the drawer pop, BridalLive prints a Cash Drawer Opening Ticket that shows who opened the drawer and when they opened it. The Cash Drawer Opening Ticket is displayed within your browser's "Print Preview" feature. To initiate the drawer pop, simply verify that the selected printer is your receipt printer and click "Print" as shown below.

BridalLive tracks each and every cash drawer opening. You can view this information on the Cash Drawer History Log which is available under Reports Audit Logs.
Conclusion
This concludes the help article on how to utilize BridalLive's Registers feature. In summary, here are the steps you will perform to begin taking advantage of this feature:
- Make sure you have your receipt printer and cash drawer setup
- Make sure you have your Registers setup
- Open all Registers as part of your store opening procedure
- Close all Registers as part of your store closing procedure
- Review Register Closure Summaries using the Register History Log and Cash Drawer Openings using the Cash Drawer History Log