This article will cover transferring inventory between locations with the BridalLive Multi-store feature.
You will be transferring the item FROM your current location TO the destination location. We recommend that you make the physical transfer of the item (i.e. move the real product first) and THEN transfer the item inside of BridalLive. This will help you keep an accurate inventory in each of the locations.
*Source location: The location where the item is currently and will be transferred from
*Destination location: The location where the item is being transferred to
What information is copied when an item is transferred?
- Item Information
- Item Attributes
- Pictures
- QOH is reduced in the source location and increased in the destination location
How to transfer an item from the Source to the Destination:
Source Location: (In example: Your Bridal Shop)
- Make sure your BridalLive Elite accounts are linked - Setup Multi-Store
- Log into the source location (the location account the item currently exists in)
- Go to the Search Items screen: https://app.bridallive.com/#/items
- Select More to the right of the item you want to transfer to the destination location
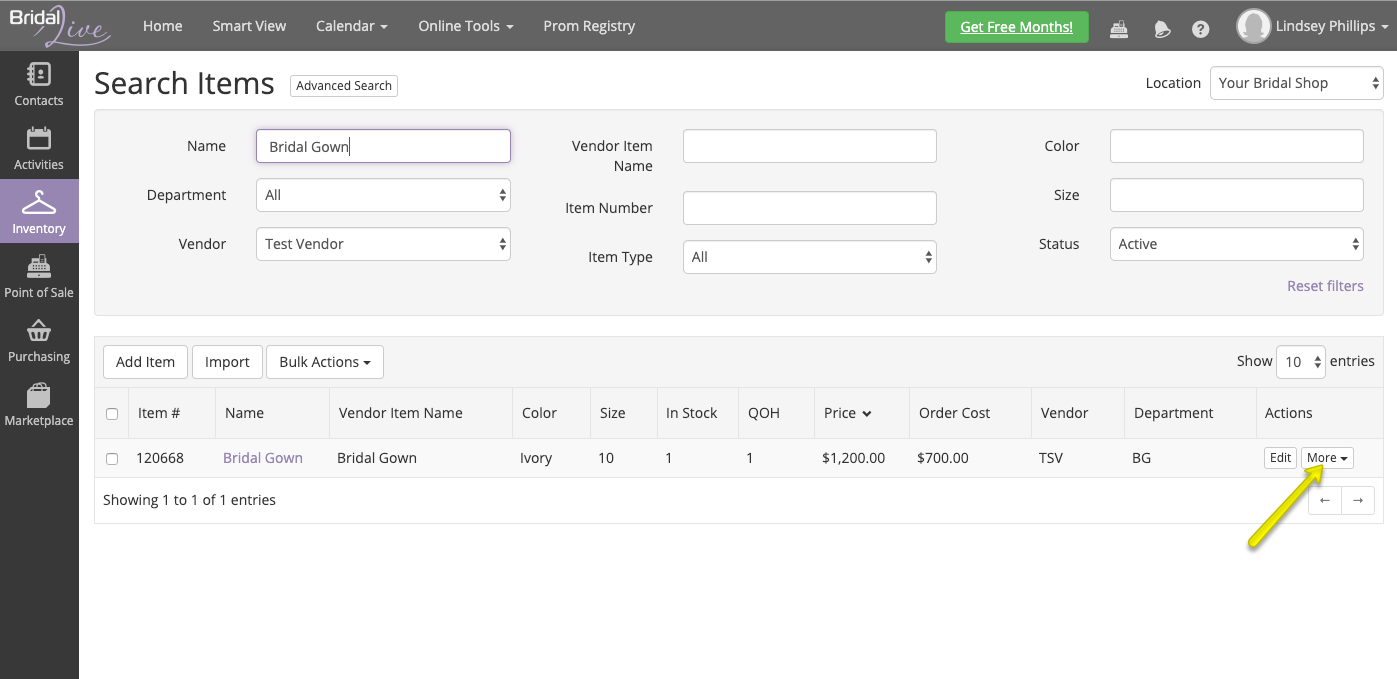
- Depending on the different scenarios above, certain things will be allowed to be transferred
- Click Transfer
- BridalLive will open the Transfer Request
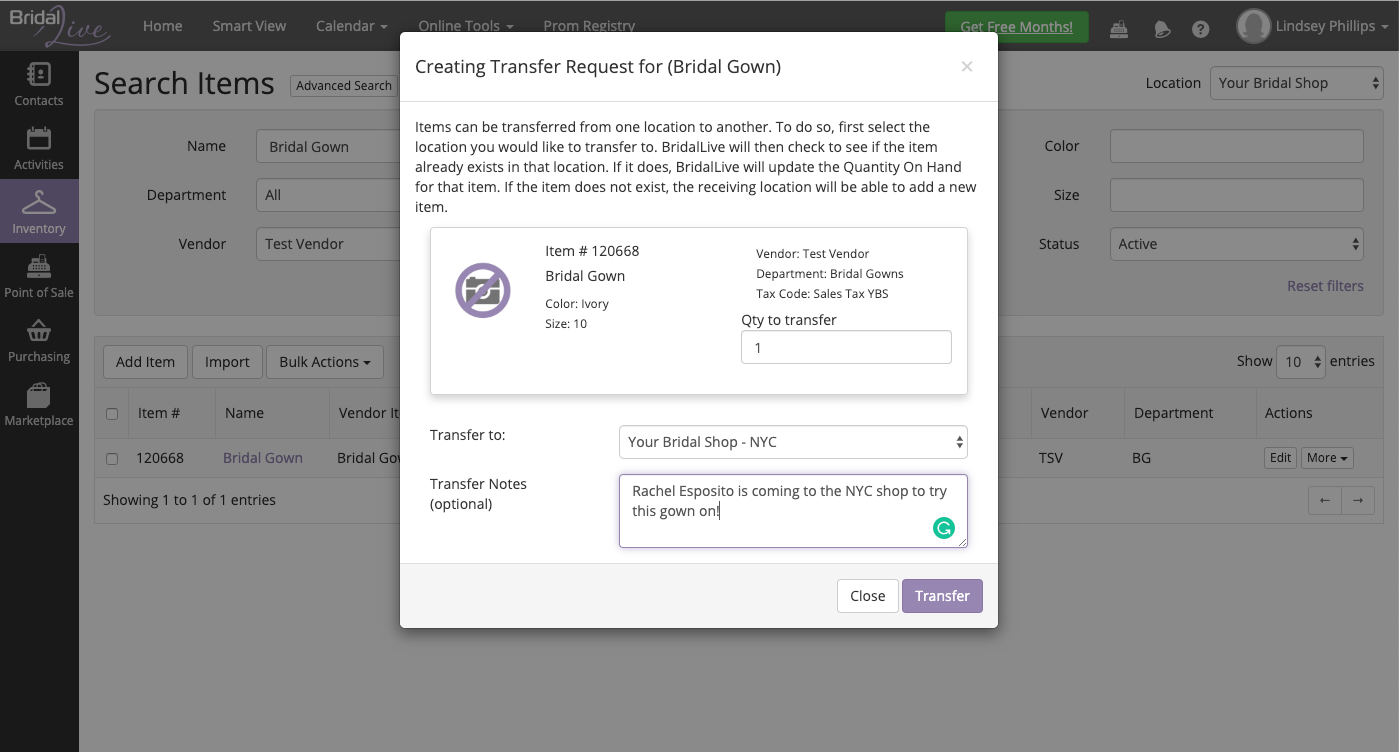
- Select the destination location
- Add any transfer notes if needed
- Click the Transfer button
- The Transfer Request for your item will now be sent to the destination location to Approve or Decline
- Destination location approves transfer - Approve will add/update the item with the qty transferred
- Destination location declines transfer - Decline will not add/update the item with the qty transferred
Destination Location: (In example Your Bridal Shop - NYC)
The Destination location will receive the Transfer Request from the Source location and can approve or decline the transfer request.
- Log into destination location
- You can view the transfer request in your notification bell or under Inventory > Transfer Requests
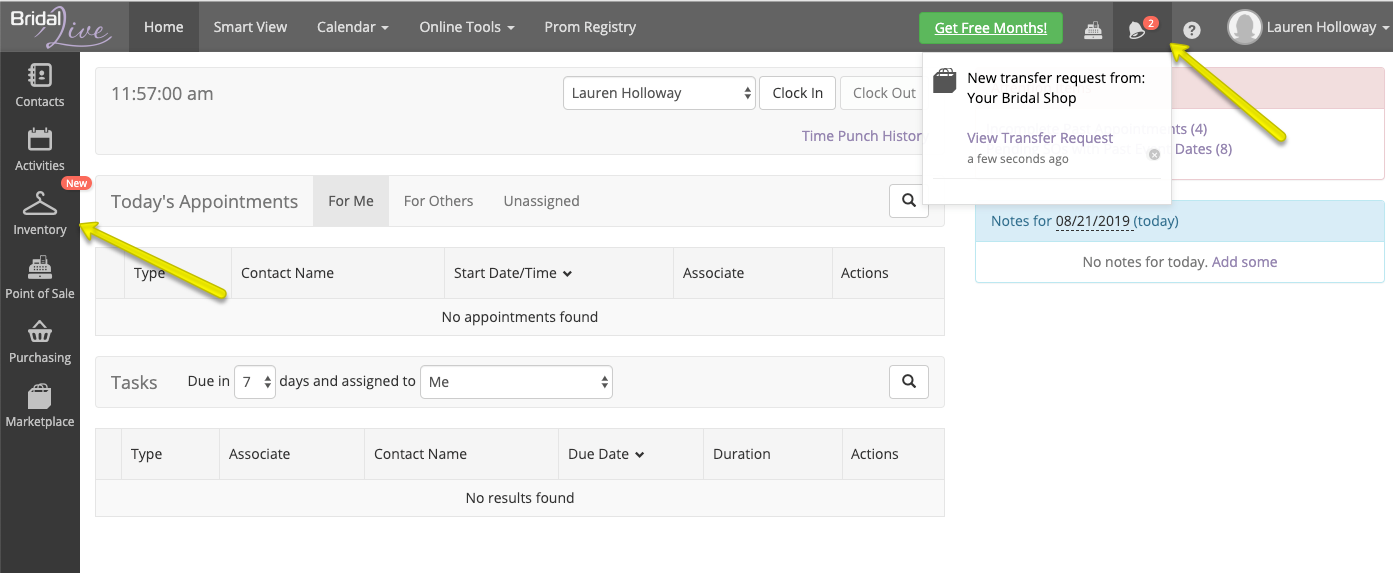
- Click View Transfer Request to open up the transfer request options
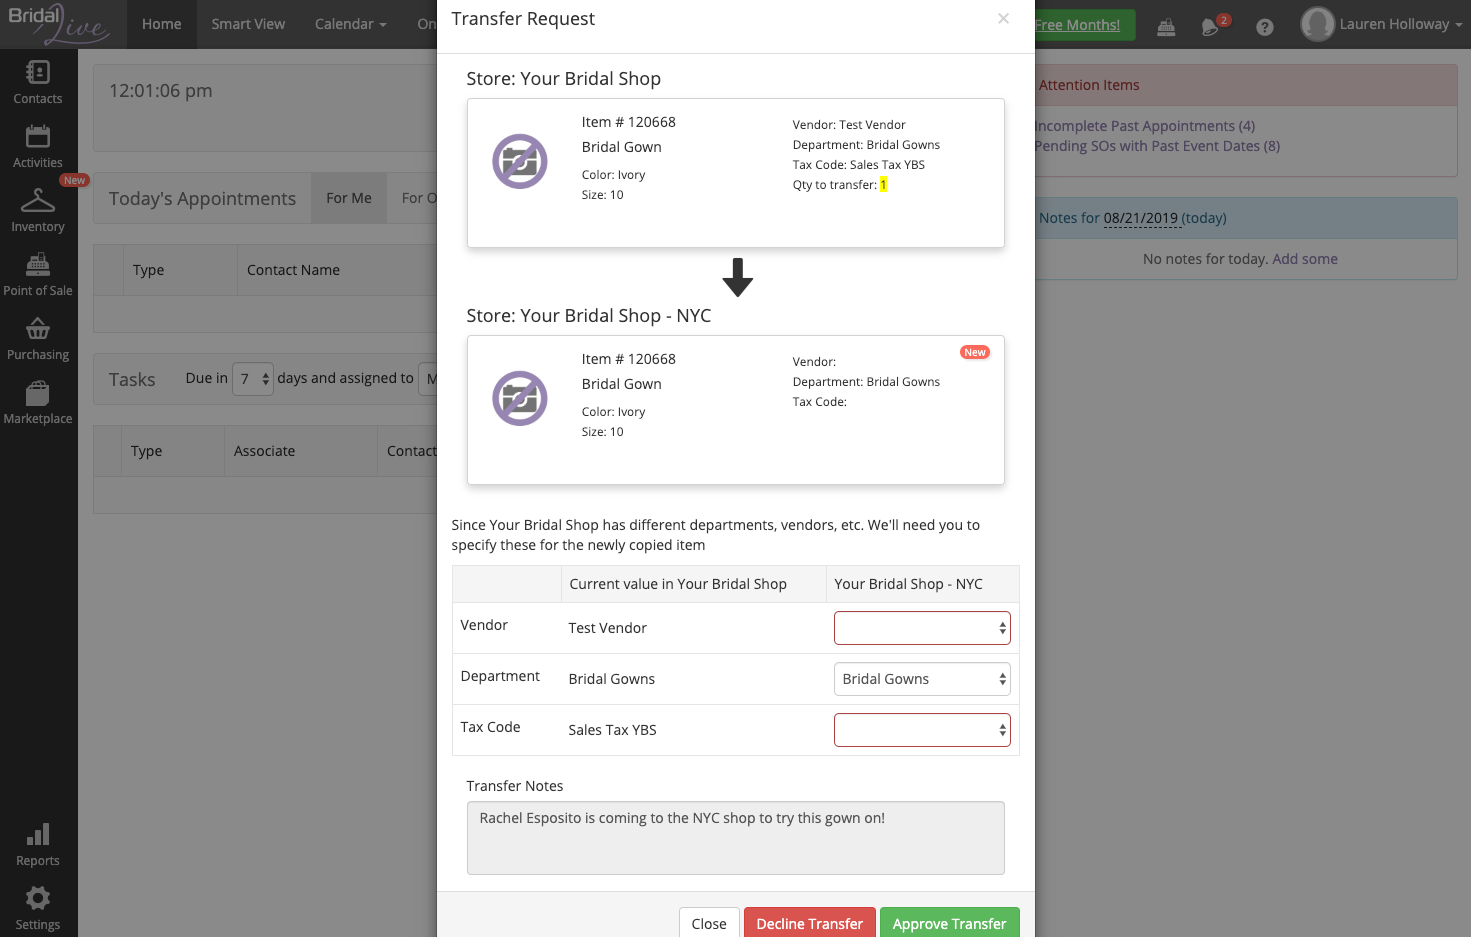
- Update any fields that may need updating for the destination location
- Review any transfer notes
- Approve or Decline Transfer
- Approve will add/update the item with the qty transferred
- Decline will not add/update the item with the qty transferred
View all Transfer Requests:
You can view all inbound and outbound transfer requests, as well as sort by pending, approved, and declined. You will find this under Inventory > Transfer Requests 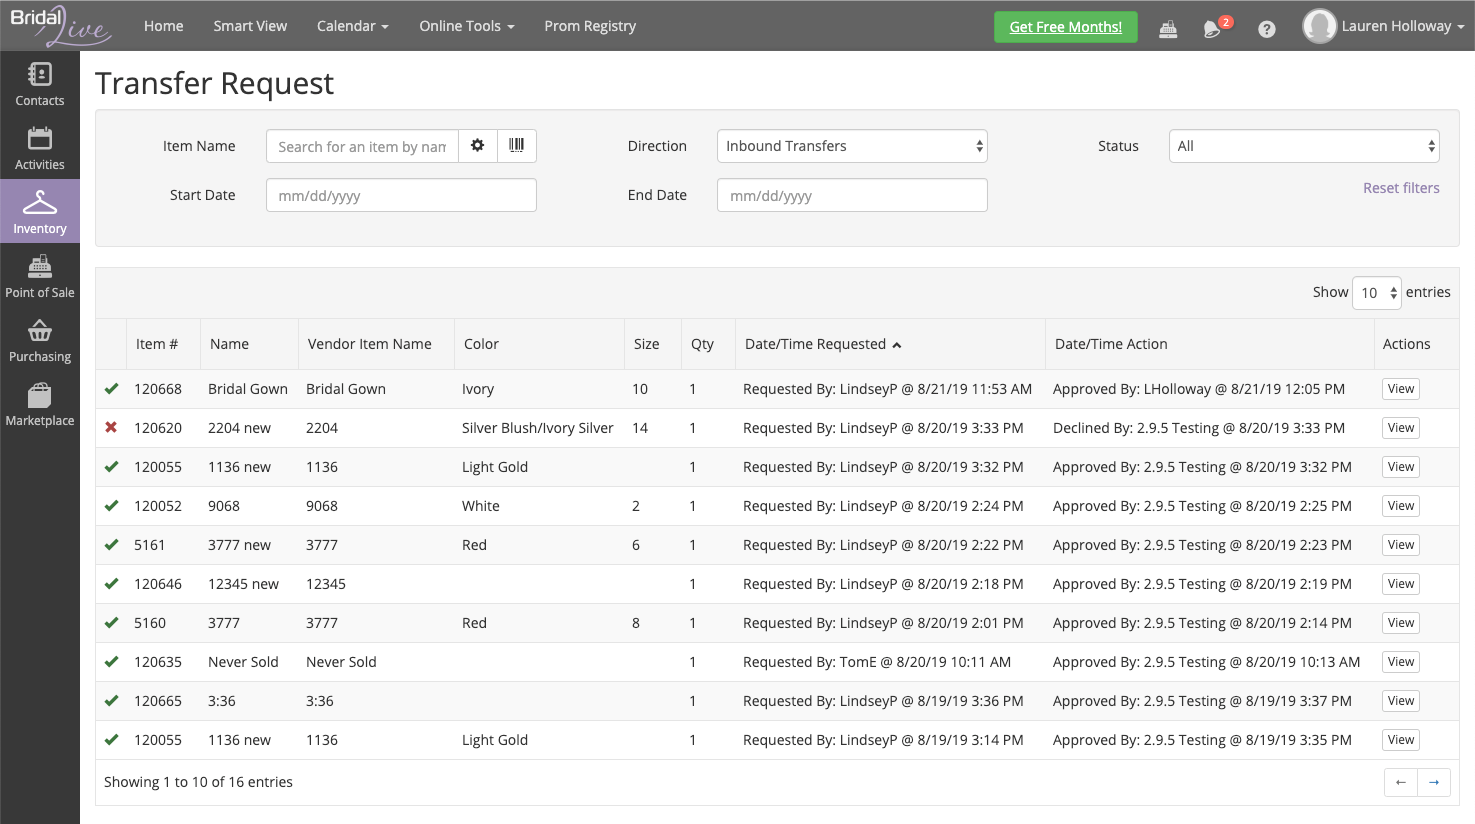
(Search Items screen with Multi-Store access showing Location dropdown and Transfer button)
FAQs and Troubleshooting
- What do I do if I don't see the Transfer button under More next to my source location's items?
- Are you looking at the Items in the correct location?
- Make sure you are logged into the source location and are transferring to the destination location
- You can only transfer items from the source location to the destination location
- Does the user name you are logged in with have the permissions to transfer items?
- Log in with a user who has access to BridalLive Settings
- Go to User Roles: https://app.bridallive.com/#/settings/role
- Select Edit next to the role to update
- Choose Inventory
- Check the box next to Transfer Items (Elite Plan Only)
- Are you looking at the Items in the correct location?
- I do not see the Location field on the Search Items screen
- Do you have more than one BridalLive Elite plan?
- To be able to use the Transfer Items feature, you will need to have more than one BridalLive Elite plan
- Have you setup your BridalLive Multi-Store feature?
- Do you have more than one BridalLive Elite plan?