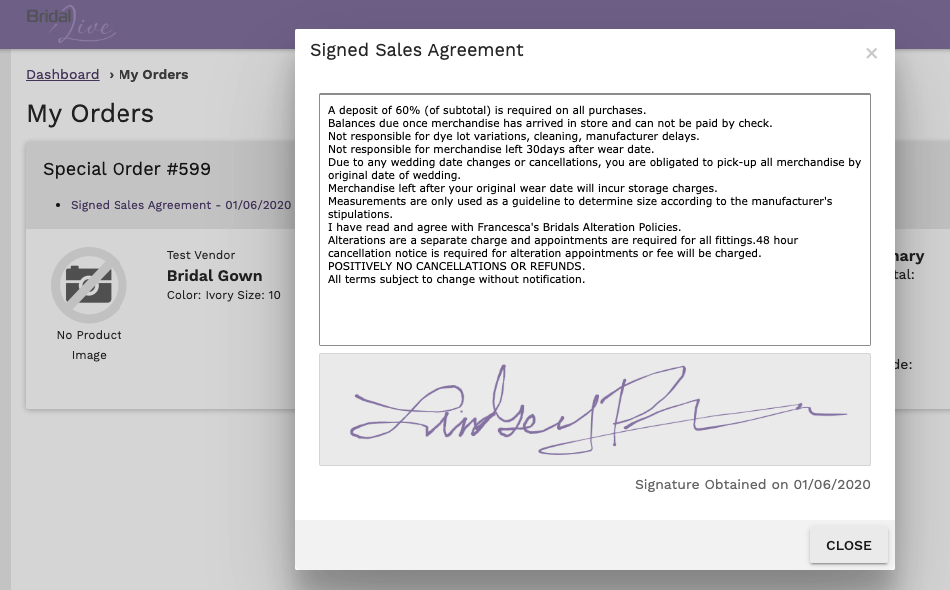
This article will walk you through how you can have your customers sign your BridalLive Sales Agreements on the wired terminals with BridalLive Pay. You can set this up once your wired terminal is set up and you are taking payments from BridalLive with BridalLive Pay.
Turn on Digital Signature
- Navigate to Settings > Point of Sale > Preferences
- Scroll to the Digital Signature Preferences section
- Set the option for Use Digital Signature feature to Yes - (must be set to yes)
- Payment Methods Requiring Signature - (optional) You can tell BridalLive which payment methods you want BridalLive to require a digital signature for.
- Transaction Types Requiring Signature - (optional) You can tell BridalLive which transaction types you want BridalLive to require a digital signature for. Keep in mind if you require a signature, BridalLive will not let you leave the screen until the signature is obtained.
Add Terminal Agreement
- Navigate to Settings > Point of Sale > Sale Agreements
- Click the purple Add button and select Custom Terminal Agreement
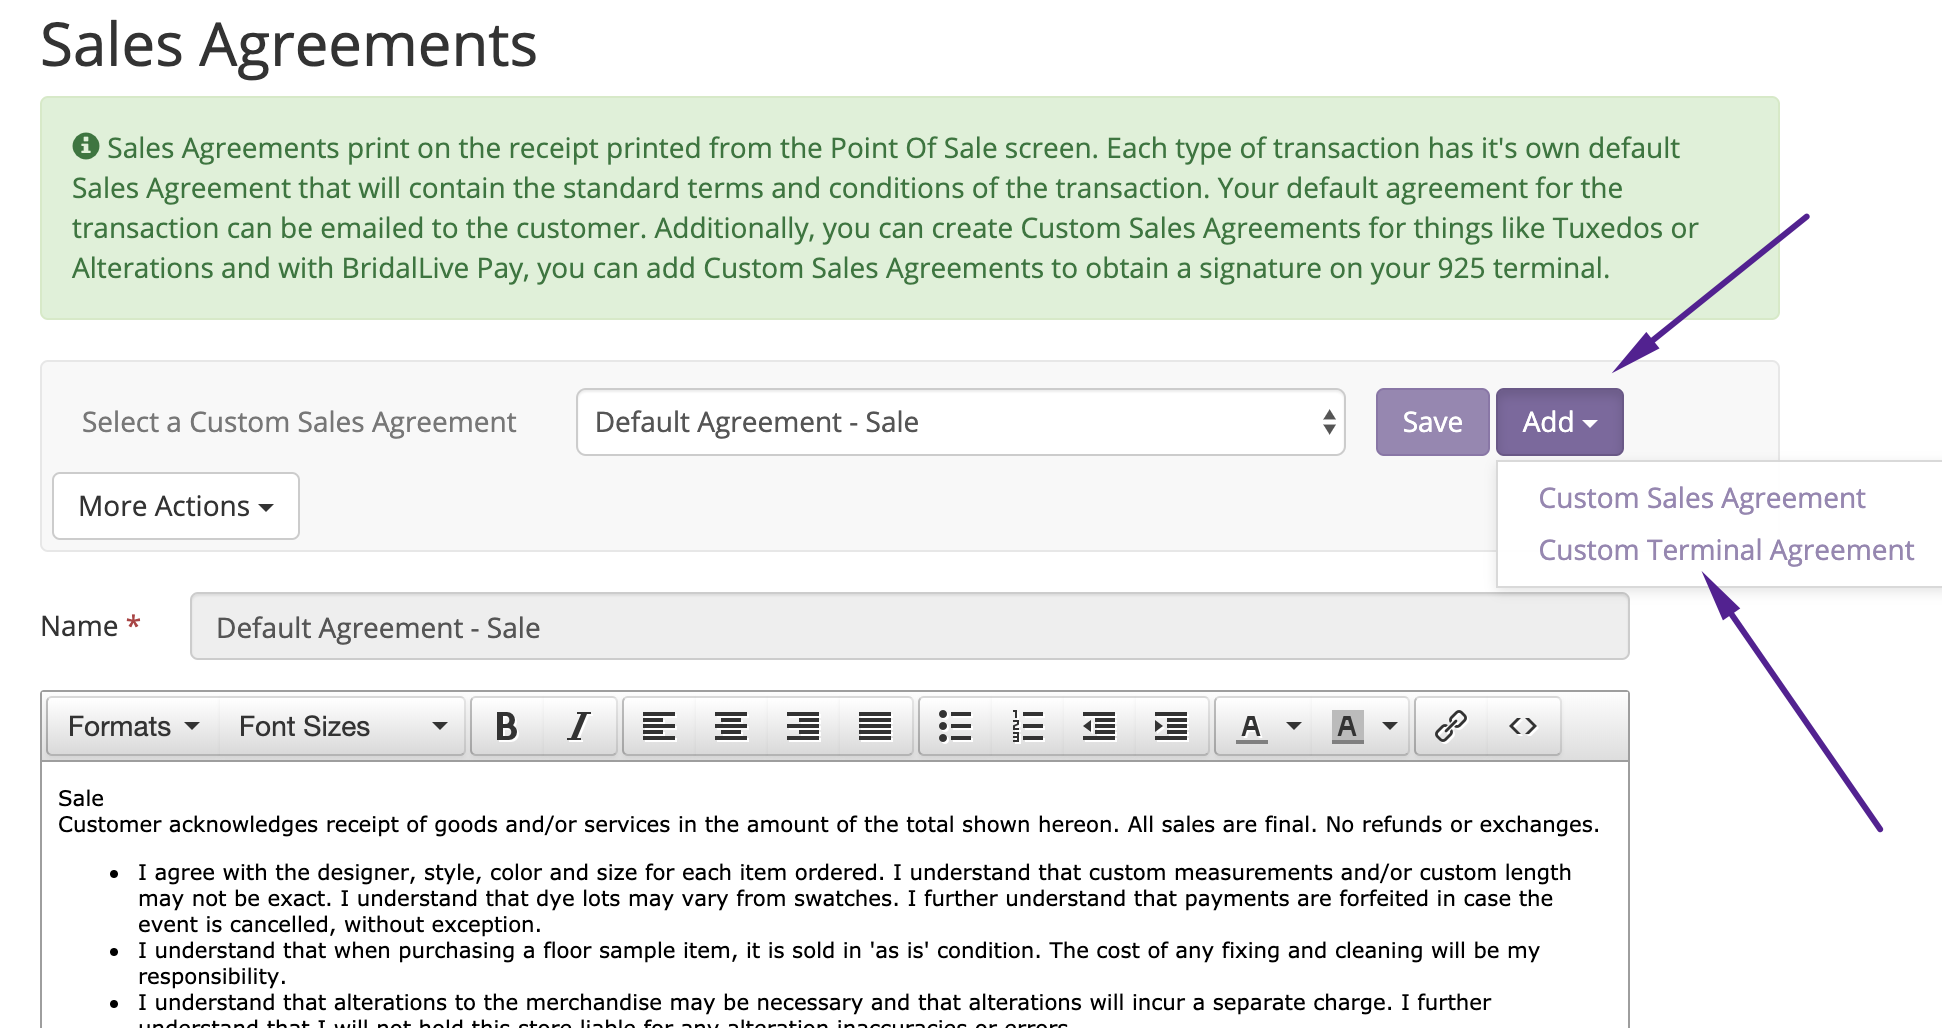
- Give your custom terminal agreement a name
- Type your custom terminal agreement in the text area. You will want to ensure that your terminal agreement is simple enough as it will need to be viewed on the terminal screen.
- Save your custom terminal agreement
Test on Terminal
- Once you save your custom terminal agreement, you will see a button that says Test on terminal. Click on the button, and BridalLive will push your terminal agreement to your associated wired terminal, so you can review what this will look like for your customers.
How Customers Sign Sales Agreement with Terminal
- Navigate to a transaction for your customer
- Click the button to the right of the Sign button
- Hover over Sales Agreement and select your custom terminal agreement you would like to send to your terminal
- You will notice any terminal agreements created will have a terminal icon to the right of the name
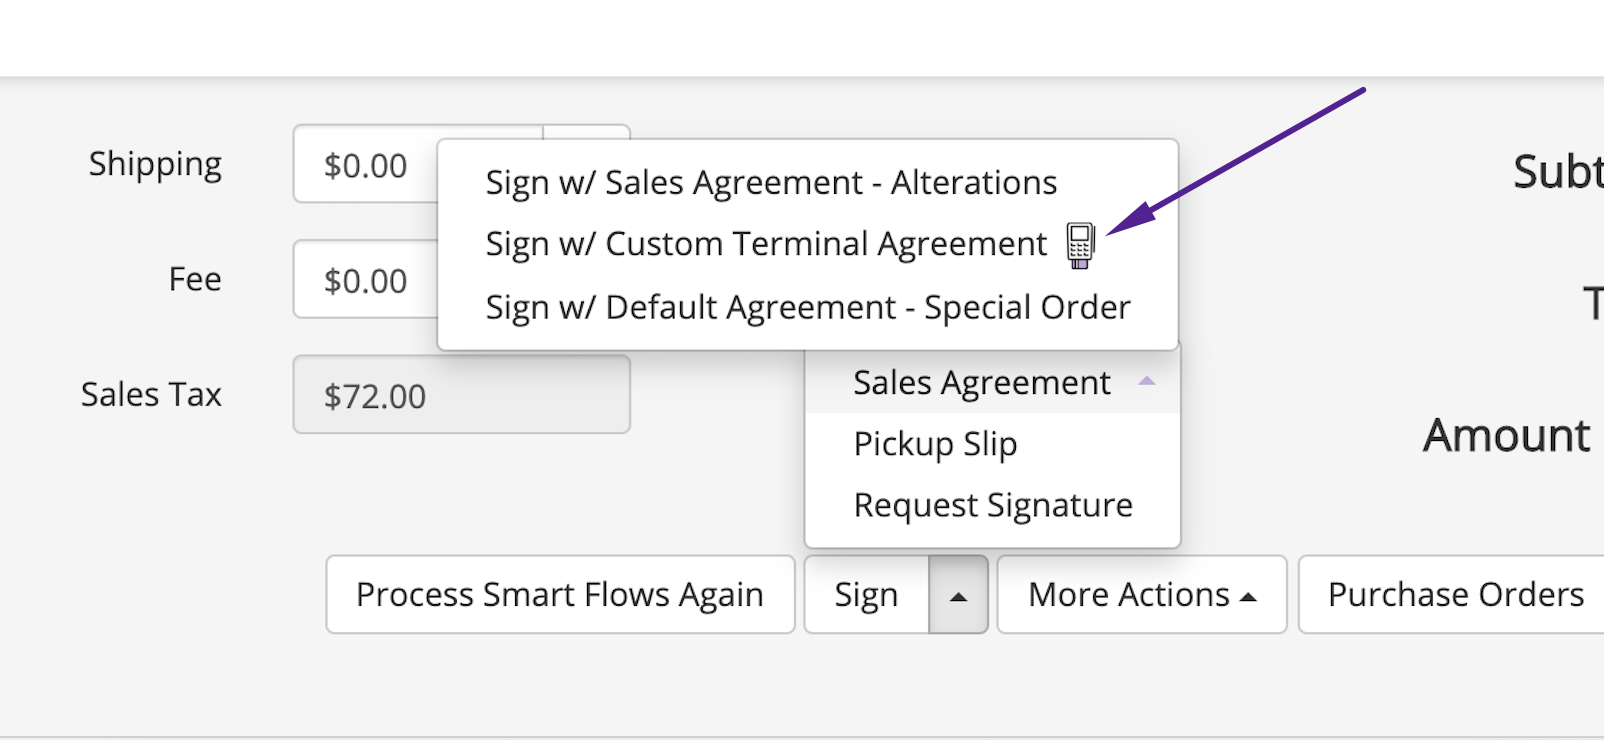
- The terminal agreement selected will then show on the terminal
- The customer will sign the indicated agreement
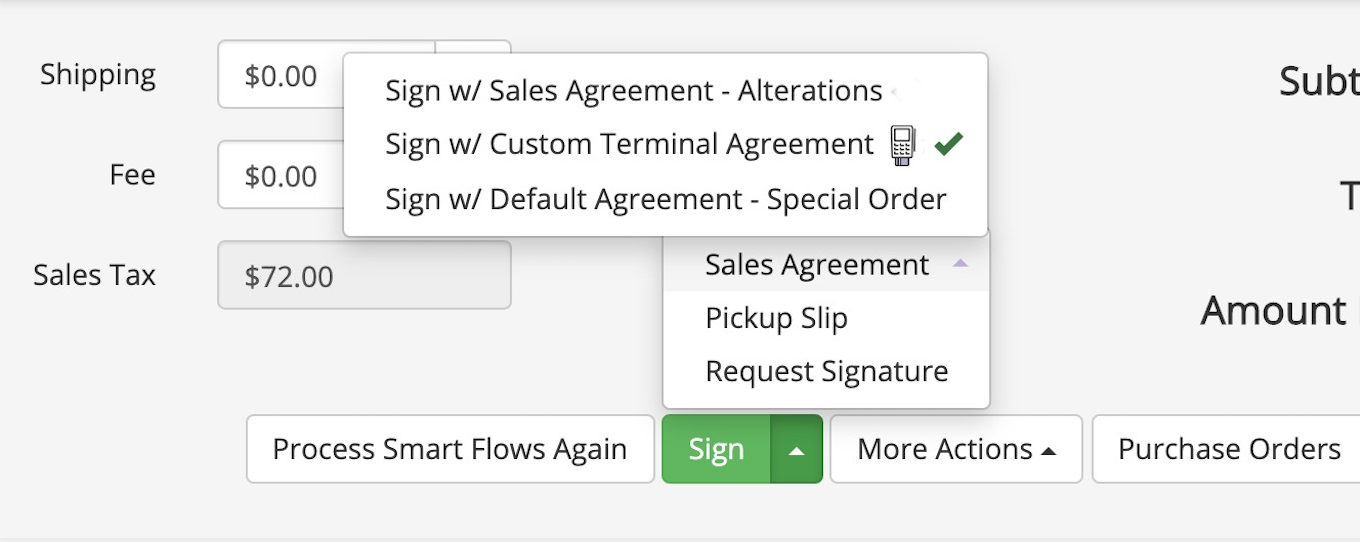
- Once the customer signs the custom terminal agreement, you will see in BridalLive on the transaction that the Sign button is now green, and if you hover over Sales Agreements, you will see a checkmark to the right of your signed agreement
How Customer Can View Signed Terminal Sales Agreement
- Print the invoice with the terminal signed sales agreement
- Select the arrow to the right of Print on your transaction, click Print w/ (select your custom terminal agreement)
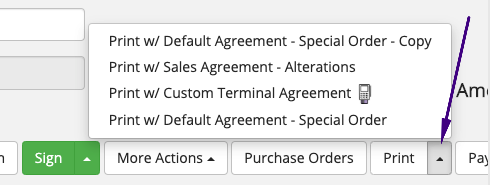
- Select the arrow to the right of Print on your transaction, click Print w/ (select your custom terminal agreement)
- Send Receipt email template with custom terminal sales agreement and signature - coming soon!
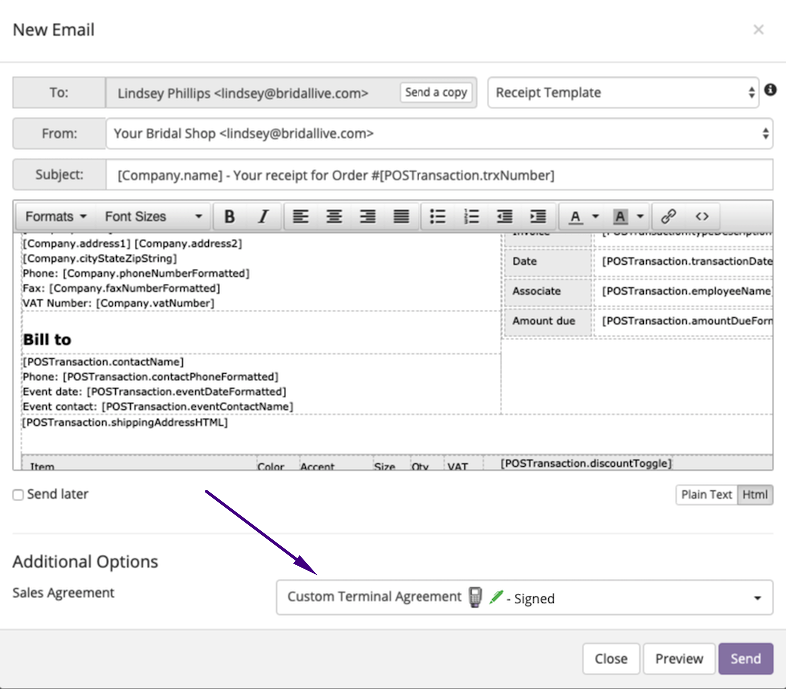
- Customers can view all signatures under their My Orders in Client Portal! (ensure you have this setting turned on in Settings > Client Portal > Advanced Settings) - coming soon!
