To set up your Company Profile, click on the "Settings" button within BridalLive.
**You may have already set up some of this information in the Quick Start Tutorial**

Company:
Company Profile
Before you begin using BridalLive, you'll need to fill out your company information. This company information will be used on your Invoices, Purchase Orders and Receiving Voucher. When entering your email address, use the email address that you'd like to use when communicating with your customers.
Preferences:
Preferences will combine your home screen report used for the Sales Performance widget as well as the store logo for printed transaction receipts. For best logo results, logos should be .png files and sized 1000 X 500.
Company Sales Goals:
Add in the company sales goal you have for each month.
Client Portal (if enabled):
All settings for the Client Portal will be housed under Company Profile in BridalLive. You will only see this option if you have enabled the Client Portal in your Account Settings.
Account Settings:
Account Settings
This is where you can update your payment information and see your next billing date as well as your current plan.
Users & Security:
Users
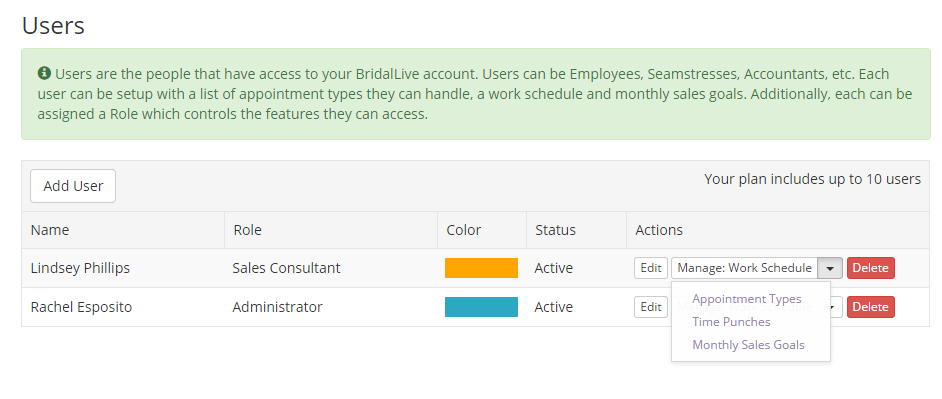
Users are the people that have access to your BridalLive account. Users can be Employees, Seamstresses, Accountants, etc. When you add new users, don't forget to select the correct role!
Adding a User
The Add User screen includes your user's contact information and color (this color will show on the calendar for appointments that are booked and assigned to this user).
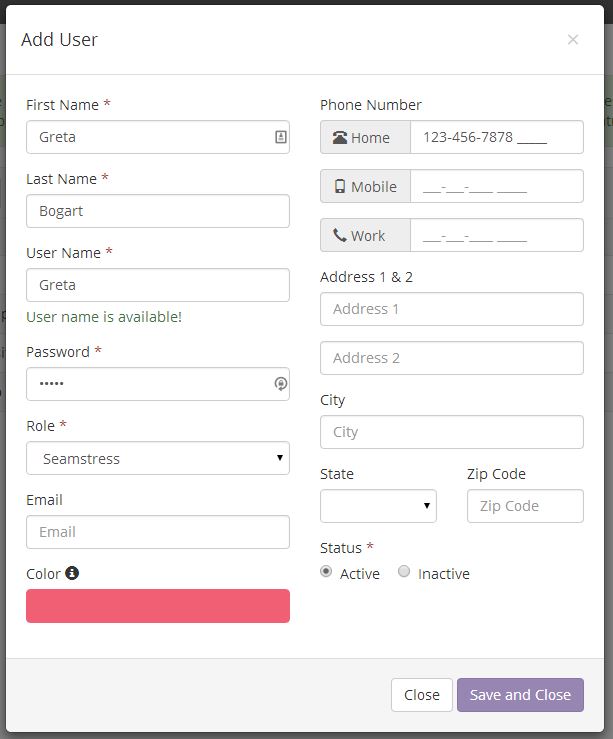
After adding a user, you will want to specify four details about that user by clicking the "Manage Work Schedule" button next to the User's Name (see figure below).
Work Schedule
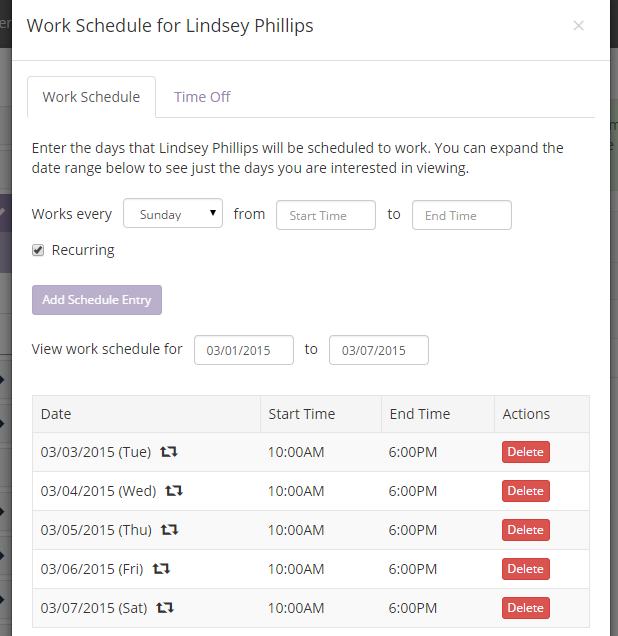
User work schedules are comprised of two factions: Work Schedule & Time Off. On the Work Schedule tab, enter the dates & times that your staff will be working. You may add RECURRING entries or ONE-TIME entries. You may also view upcoming scheduled times by adjusting the view work schedule dates.
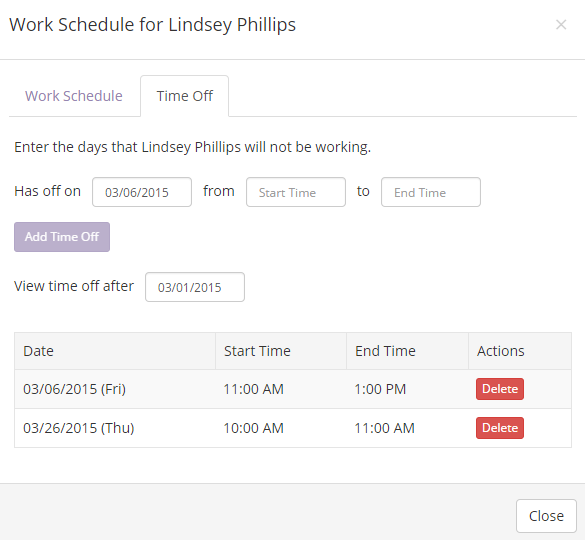
The Time Off tab is used to schedule time off for your staff (i.e. vacation days, lunch breaks, etc). This can be for a full day or just a defined period of time.
Appointment Types
Appointment types are where you specify which type of appointments your User can accept. If this is left blank, then the User will be allowed to accept ALL appointment types.
To edit Appointment Types go to Settings - Activities - Appointment Types
Time Punches
View and add, edit or delete your associates' time punches
Monthly Sales Goals
Set up your associates' monthly sales goals, in dollars.
User Roles
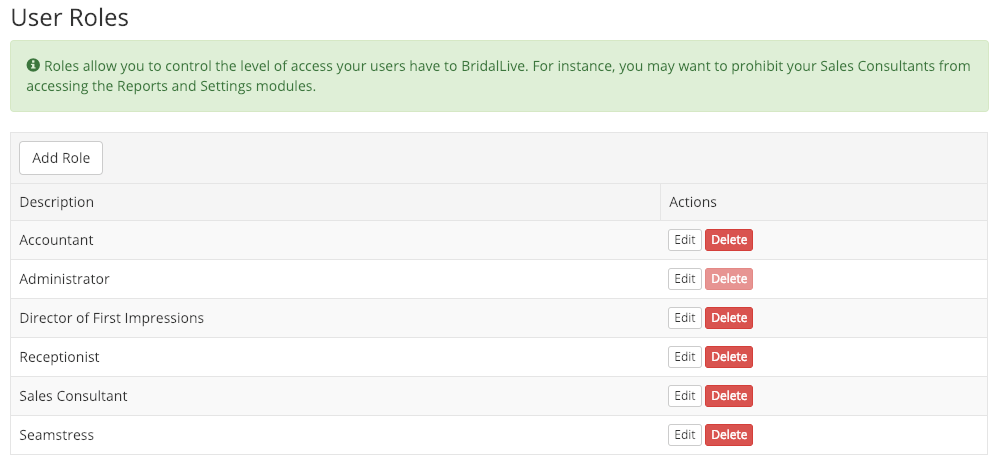
Roles allow you to control the level of access your users have to BridalLive. For instance, you may want to prohibit your Sales Consultants from accessing the Reports and Settings modules.
BridalLive is loaded with pre-defined roles. You may use these, edit them or create your own.
Authorized Devices
Click here for a video on setting up Authorized Devices
Click here to proceed to Step 2: Contacts & Activities