Using Color Groups and Size Charts allows to you prevent staff members from making ordering mistakes. One nice benefit of using Color Groups and Size Charts is that tou can tell BridalLive to prevent staff members from using a Color or Size on a Special Order if that color or size does not exist in the Color Group or Size Chart. This is done by going to Settings Point of Sale Preferences Select "Yes" next to the Color/Size must match Color Group/Size Chart preference.
Before you can begin using this feature, you'll need to get the color groups and size charts setup. The rest of the article will focus on walking you through the setup.
Color Group Setup
Color groups are associated with Vendors and then assigned to Items after they are created. This means that you'll navigate to Inventory Search Vendors Edit a Vendor to create or edit Color Groups.
Color Groups are used if you would like to limit the colors that can be assigned to an item on a Special Order. For example, if your vendor is Mon Cheri and their satin bridal gowns are only available White & Ivory, you may want to create a Color Group called "Mon Cheri Satin Bridal Gowns" or just "Bridal Satin" and add the colors of white & ivory.
Adding a Color Group:
- Open a Vendor (or add a new one)
- Click "Color Groups" to see the color groups for this vendor
- Click "Add Color Group"
- Name your Color Group
- Enter the list of colors that apply to this group, separated by commas. The maximum length for color is 30 characters (including spaces)
- Click "Save Color Group"

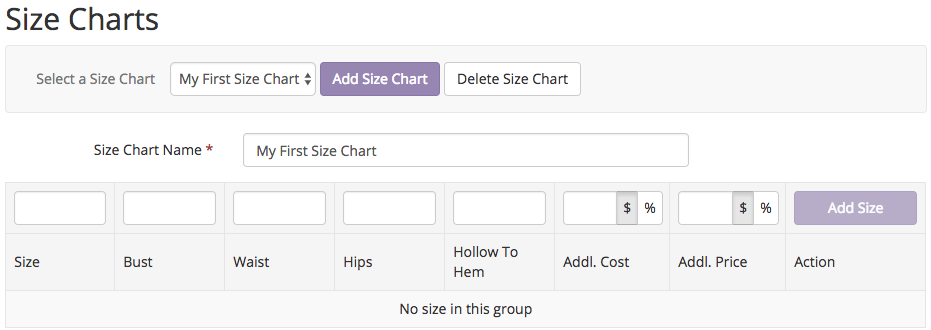
Size Chart Setup
Size Charts are associated with a vendor as well. To setup a Size Chart click Inventory Search Vendors Edit a Vendor.
Size Charts are used if you would like to limit the sizes that can be assigned to an item. For example, if your vendor is Mon Cheri and their bridal gowns are only available in sizes 4-18, you may want to create a Size Chart called "Mon Cheri Bridal Size Chart" or just "Bridal Size Chart" and add the sizes 4-8, along with the measurements for those sizes. You may also add additional prices & costs for upsize fees, that will be reflected on your Transaction Screen.
Adding a Size Chart:
- Open a Vendor (or add a new one)
- Navigate to the Size Charts section
- Add Size Chart
- Name your Size Chart
- Enter the following information for each size: Size, Bust, Waist, Hips, Hollow to Hem, Addl. Cost (if there is a wholesale fee for this size), Addl. Price (if there is a fee for this size that you charge the customer).
- Save
Apply Color Group & Size Chart to Item
Once you have added your Color Groups & Size Charts you now need to apply them to your items. To do this, follow the steps below.
- Open an inventory item (or add one)
- Click the icon next to the Color, Accent Color and/or Size fields (see figure 3).
- A pop-up window will appear, Choose the Color Group or Size Chart you would like to assign to this item
OR you can just type in the colors you would like to apply to this item, but these will not be added to your list of groups. (see figure 4) - If you are linking a Size Chart you can optionally select the Stock Size by highlighting it and choose Select.
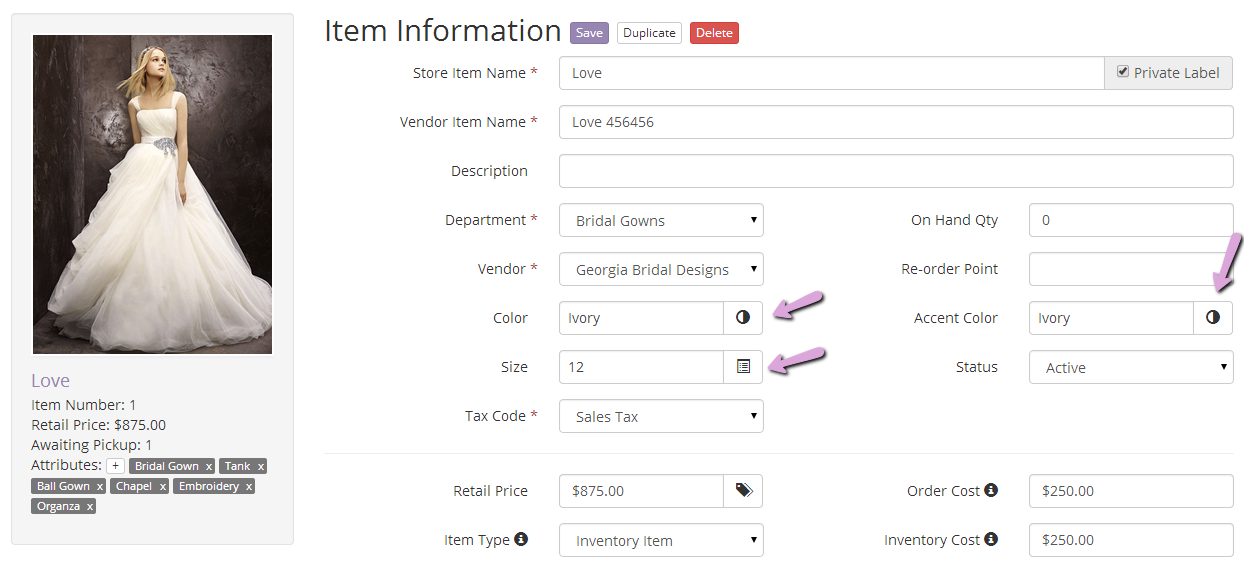
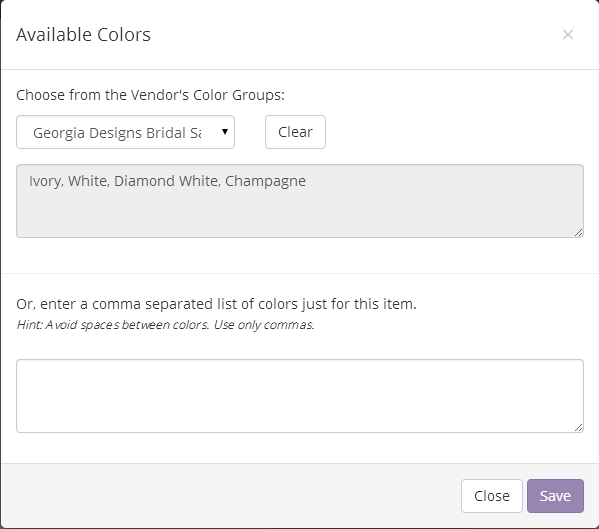
Figure 4 - Color Group popup
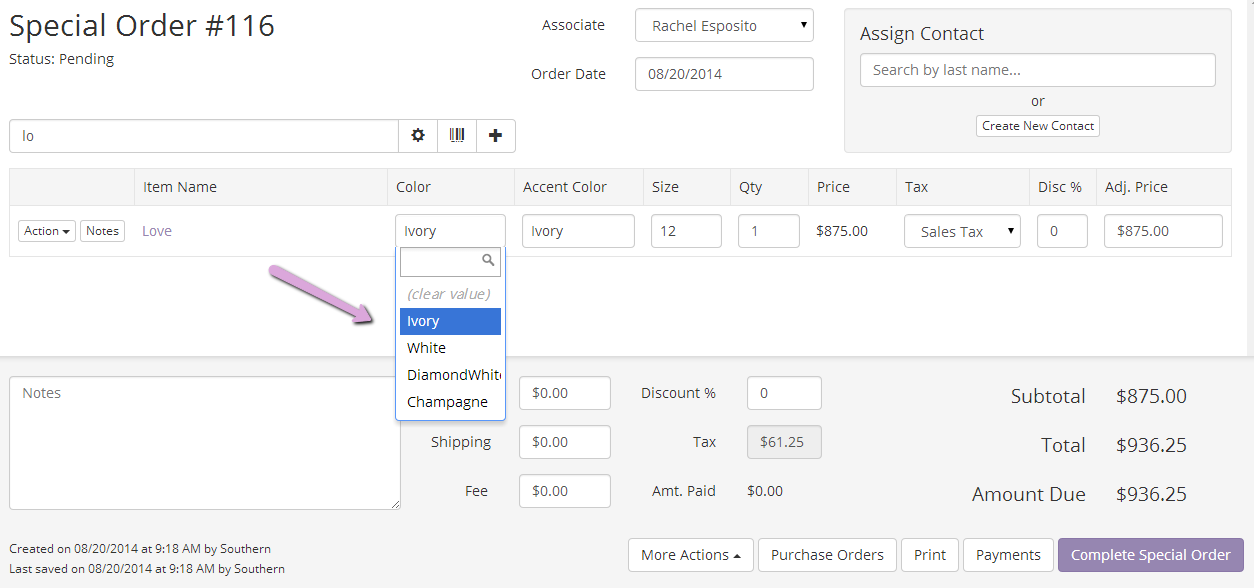
Using the Color/Size Groups on a transaction
Now that have assigned your Color Groups & Size Charts to your items, you can use them on a transaction.
How to use Color Groups & Size Charts:
- Create a transaction
- Add an item that has a Color Group and/or Size Chart assigned to the transaction.
- When you click on the Color, Accent Color or Size Chart fields you should now see a drop-down list of all the options that you added.
- Make a selection
- Press Enter or Tab to save the chosen selection
Restricting Color & Size selections
BridalLive allows you to restrict the Color, Accent Color and/or Size Chart selections made on the transaction. This helps prevent errors. When this setting is turned on, an associate will only be able to enter a color that matches a color from the color group. The same applies for the size chart.
To turn on this setting, follow these steps:
- Settings - Point of Sale - Preferences
- Go to the line "Color/Size must match Color Group/Size Chart"
- Set it to "Yes"
Note: If you choose to restrict access, ALL of your items must have Color Groups & Size Charts assigned.