The Client Portal is designed to provide a seamless digital experience for your clients. You can update colors, fonts, imagery, etc. This can be done on the Look and Feel tab of the Client Portal Settings Page.
Let's walk through the option for configuring your portal's aesthetics by first navigating to Settings Company Client Portal Look & Feel tab.
Previewing your Portal's Look & Feel
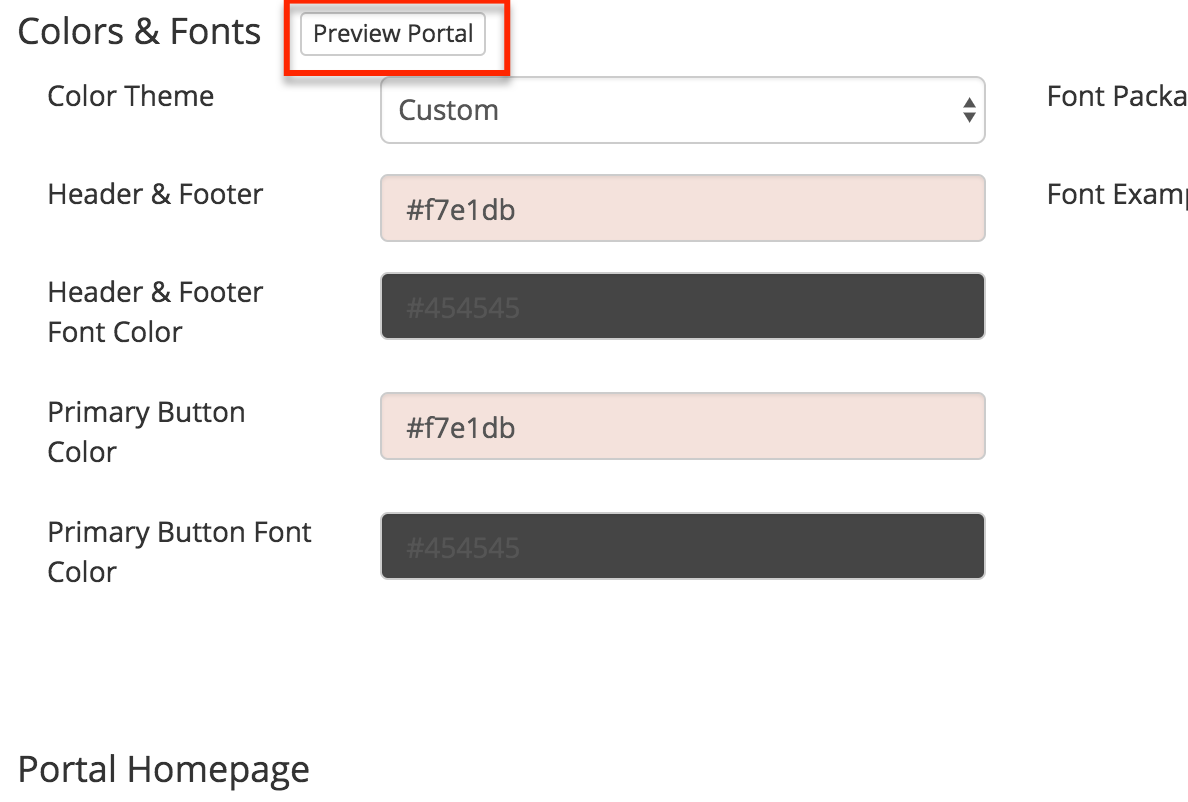
We've provided an easy way to preview how your Portal will look to your clients. To preview your Portal, just click the "Preview Portal" button shown below.
You will be asked to select a Contact to use while previewing. Please Note: When Previewing the Look and Feel, you will be logging in on behalf of your customer any change you make will be done on behalf of that customer. It's a good idea to create a dummy contact to use while previewing.
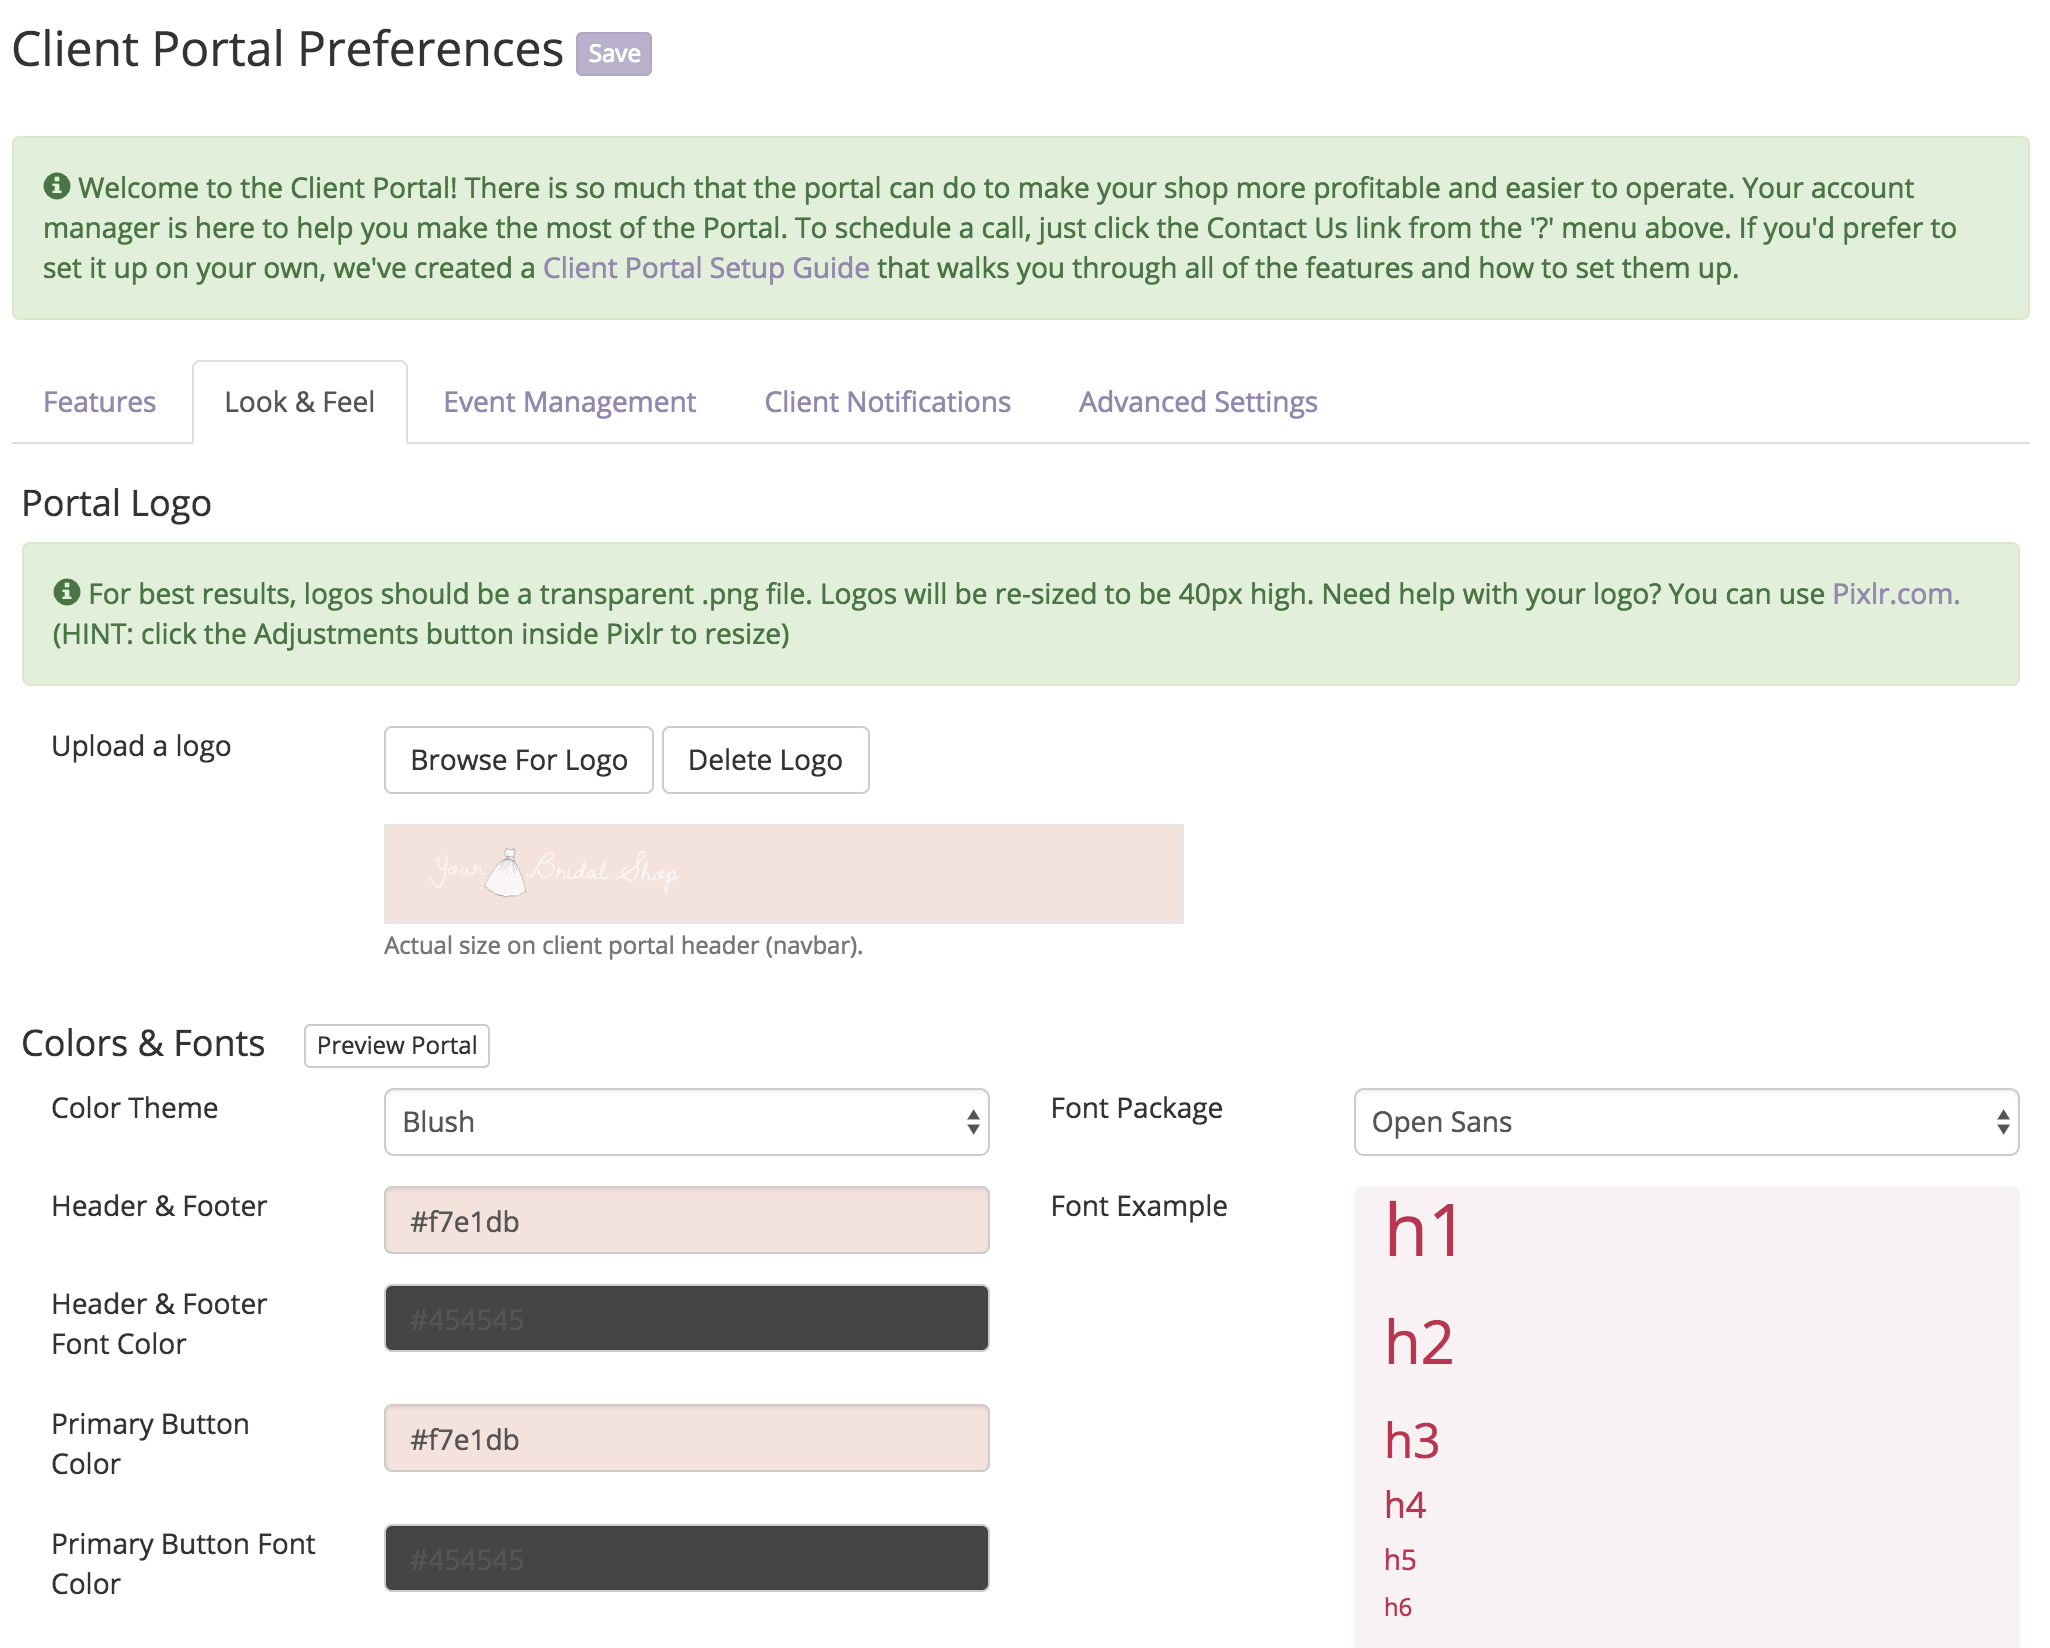
Uploading a Logo
The logo used within the Client Portal is different from the one that is used on your Receipts. For best results, logos should be a transparent .png file. When uploaded, your logo will be resized to fit in the header of the portal. It is best if you use a horizontal version of your logo that looks beautiful when scaled to 40px high. Your web designer should be able to help you obtain a copy of your logo that looks great!
To upload a logo, simply click the Browse For Logo button and select the .png file that meets the specifications listed above. Once your logo is uploaded, BridalLive will display it as it will appear inside the Client Portal. If you don't like the way it looks, you can always choose "Delete Logo" and re-upload a new one.
Once you are happy with your logo, click the "Save" button to update your Portal.
Colors & Fonts
We've included several color "Themes" that look great. You can choose from one of the pre-defined themes from the Theme drop-down or create a totally custom look.
To create a custom look, first, choose "Custom" from the Theme drop down. Then you will be able to change the color options by clicking into the field whose color that you'd like to change (as shown below).

Once you have settled on a color scheme, click "Save" to update your Portal.
Homepage and Greeting Format
When your clients arrive on the Portal's Homepage, they will see your main graphic (i.e. Hero Image) and a greeting. You have the option of changing the Greeting Format, Greeting SubText and Hero Image.
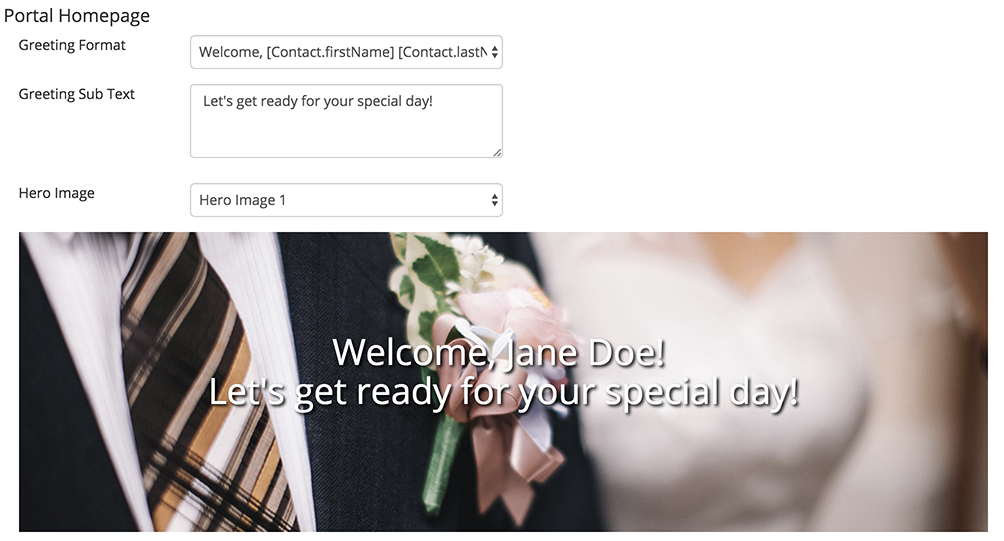
The Client Portal comes with 6 pre-defined Hero Images, but you can always upload your own. To upload a custom Hero Image, select "Custom" from the Hero Image drop down. You will want to take care and ensure that your Hero Image is sized correctly so that it looks great on all devices.
On Computers, the visible portion of your Hero Image will be 1170px X 300px (the middle 300px). On Mobile devices, the entire image, 1170px X 780px, will be visible.