Connecting the Lane 7000 to your Network
Follow the steps below to connect the device.
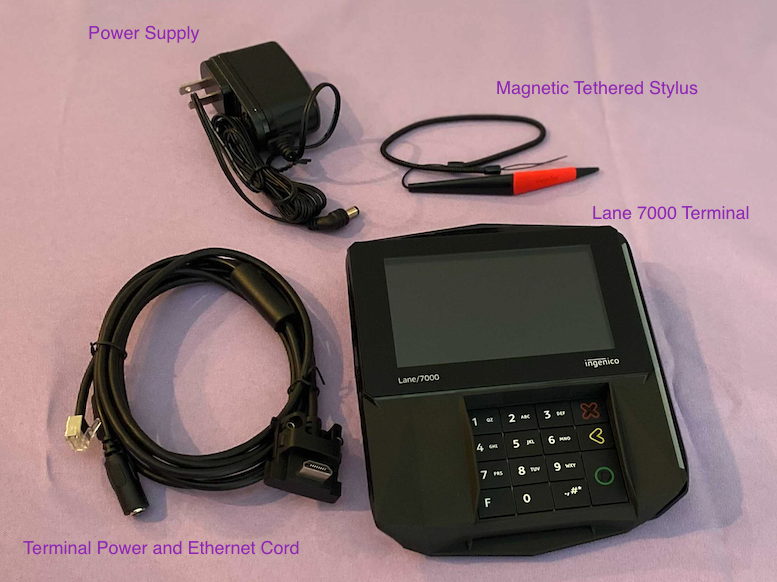
- Gather your materials from your box

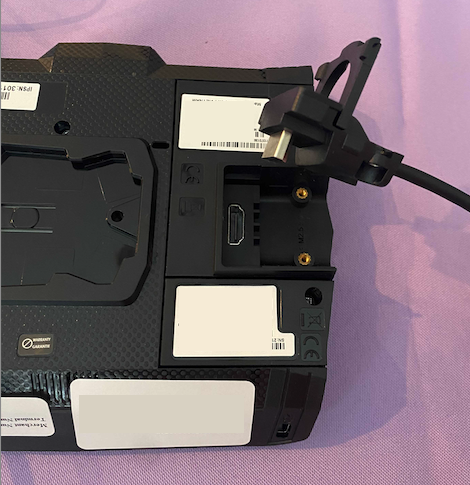
- Connect the PinPad Cable to the back of your Lane 7000.

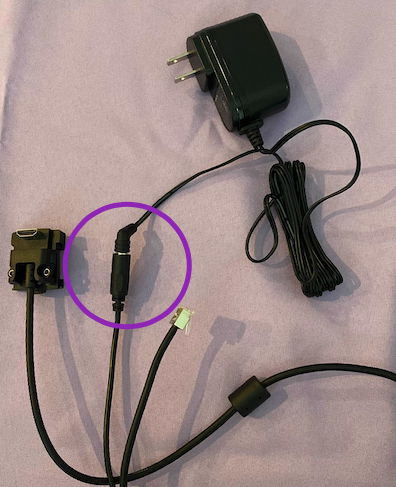
- With the same PinPad cable connect the ethernet portion into your router/switch and then connect the included power supply into the Pinpad cable (Next to the ethernet cable).

- Plug the power supply into the outlet
- Your device will begin to boot up. This will take a while, please be patient.
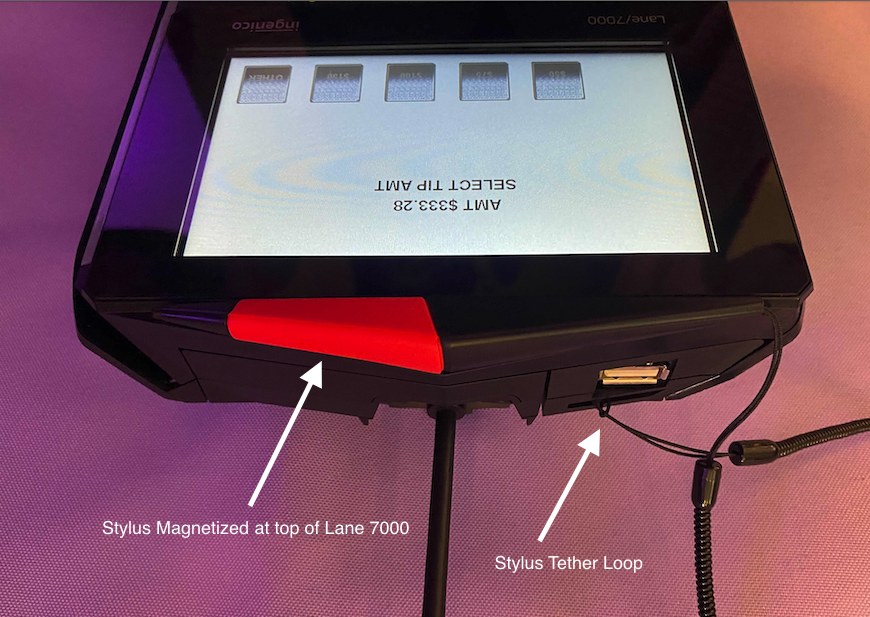
- While the device is booting up, you can tether your magnetic stylus to the top of the device by slipping the cord loop around the tether slot.

- When the bootup process is complete, you will see an activation code on the terminal screen.
- If you see the TriPOS screen and did not receive an activation code, please unplug the terminal from the wall and leave out for 30 seconds then plug it back into the wall to reboot the terminal.
When you see the activation code, you know that the device is connected to the internet. The next step is to activate the device in Merchant Track. To do so, follow the directions below.
Activate device in MerchantTrack
- Navigate to MerchantTrack Single Sign On by clicking your name in the top right of BridalLive and select Open MerchantTrack
*If you do not see this button, please enable your MerchantTrack Single Sign On - Navigate to Terminals and select Activate Terminal
- Enter the Activation Code
- Give the device a description
- Select the correct Merchant if you have more than one location
- Click "Activate"
- Device will begin to activate and reboot. This process can take a moment, so please be patient.
- The device will read "TriPOS" when the activation is successful.
Having trouble activating the device? Check out our Troubleshooting article
Link BridalLive to the Device and Test a Payment
Once your device is set up within MerchantTrack, it's ready to be linked to BridalLive. We have a separate tutorial that will walk you through the process. Click here to continue.
Take Associate Tips with BridalLive Pay
Once your device is activated and setup in BridalLive, you can set your terminal up to accept tips! Review our guide here for more info.
Setup Terminal Sales Agreements
Once your device has been linked to the device and tested, you can add in your terminal sales agreements to push your sales agreement directly to the terminal to receive a signature into BridalLive. Click here to continue.
BridalLive Pay Reporting
BridalLive Pay has many options for payment reporting. To access reports in BridalLive, navigate to Reports in the bottom left and select BridalLive Pay Reports. Please also review your End of Day processes at the top of BridalLive. This will allow you to review all payments inside BridalLive and your MerchantTrack account for payment reconciliation.
Payment Search - This report gives you a list of all BridalLive Pay payments from your MerchantTrack received during a particular time frame. Run this report at the end of every day as part of your reconciliation process.
Funding Report - This report shows you payment funding details
Tip Report - This report displays a summary of tips for associates.
Tip Item Journal - This report displays a detailed breakdown of all payments that have tips for associates.
Pre-Authorized Payments - This report displays a detailed breakdown of all payments that have tips for associates.
To locate your monthly Merchant Statement and further payment-specific reporting, please user MerchantTrack by clicking your name in the top right and selecting Open MerchantTrack. *If you do not see this button, please enable your MerchantTrack Single Sign On